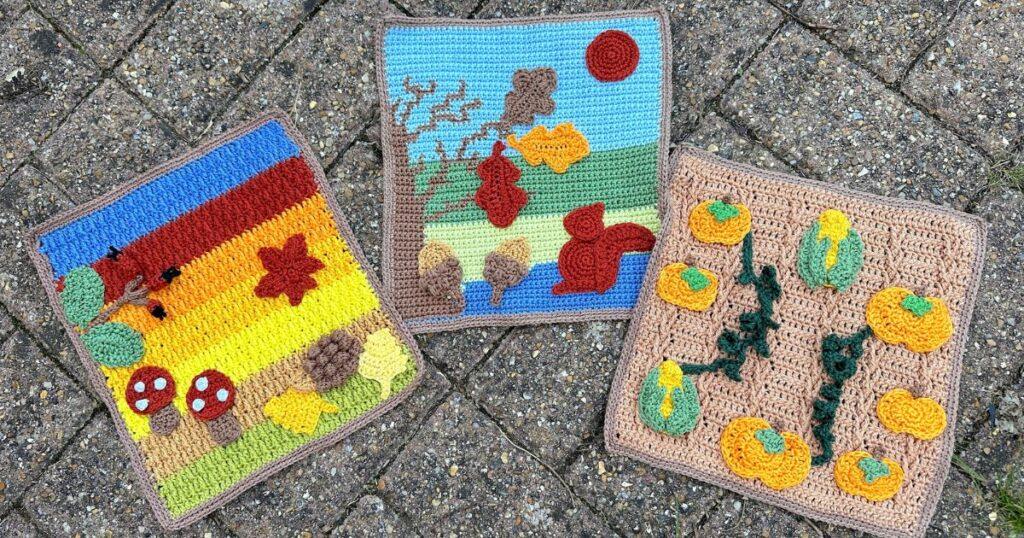
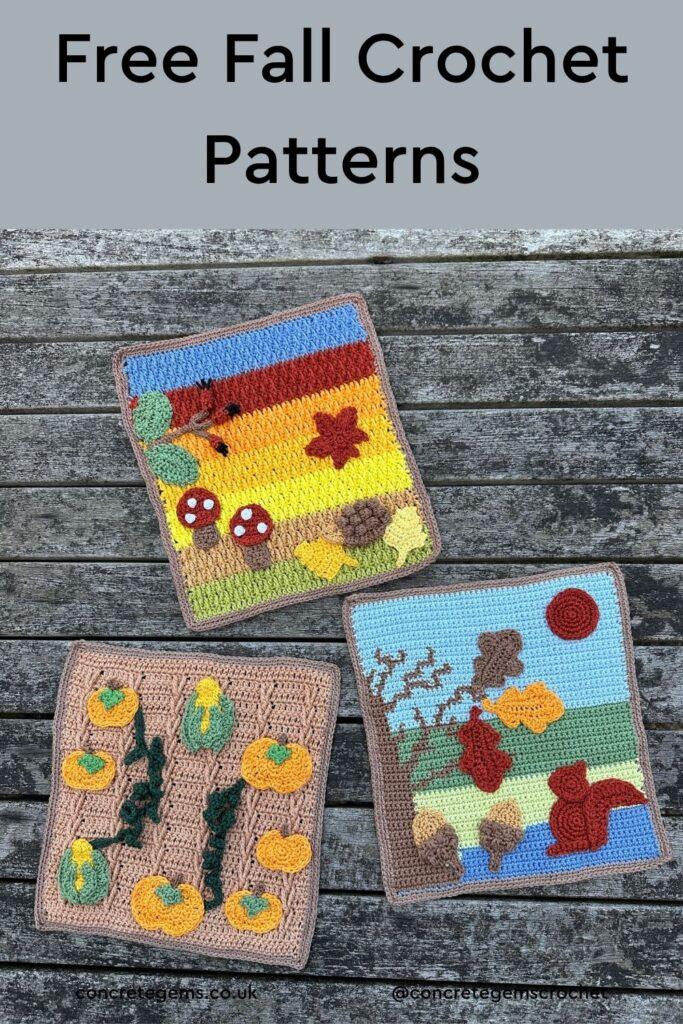
Autumn Landscapes is a set of three crochet picture patterns, each built from a background scene and a mix and match collection of 14 appliqué motifs, from pumpkins and falling leaves to a hedgehog snuffling through the undergrowth. These free fall crochet patterns are designed to be rearranged however you like, so no two finished pictures ever need to look quite the same.
This is the third instalment in my seasonal landscapes project, following on from the Spring and Summer picture sets, and it’s every bit as flexible. Build a woodland scene thick with acorns and toadstools, keep things sparse with just a scattering of leaves, or go heavy on pumpkins, it’s entirely up to you.
Disclosure: This post may contain affiliate links. This means we may receive a commission if you click a link and make a purchase. However, this does not influence our product recommendations, which are based on honest reviews and genuine enthusiasm. Read my Privacy Policy for more information.
Pattern Overview: Free Fall Crochet Patterns
- Pattern type: A set of 3 autumn landscape pictures with mix and match appliqué motifs
- Skill level: Intermediate (confident with basic stitches and repeats)
- Stitches: single crochet, half double crochet and double crochet are the main stitches used, with a few special stitches worked into the motifs too
- Size: Each picture measures 9.5in (24cm) wide by 9.75in (25cm) tall
- Yarn: Scheepjes Catona
- Hook size: 3mm
- US terms: Written in US crochet terms
- Highlights: With 14 mix-and-match appliqué motifs, including pumpkins in two sizes, oak, birch, maple and rose leaves, a squirrel, hedgehog, toadstool, acorn, harvest moon and rosehip sprig, you can build a scene that’s entirely your own.
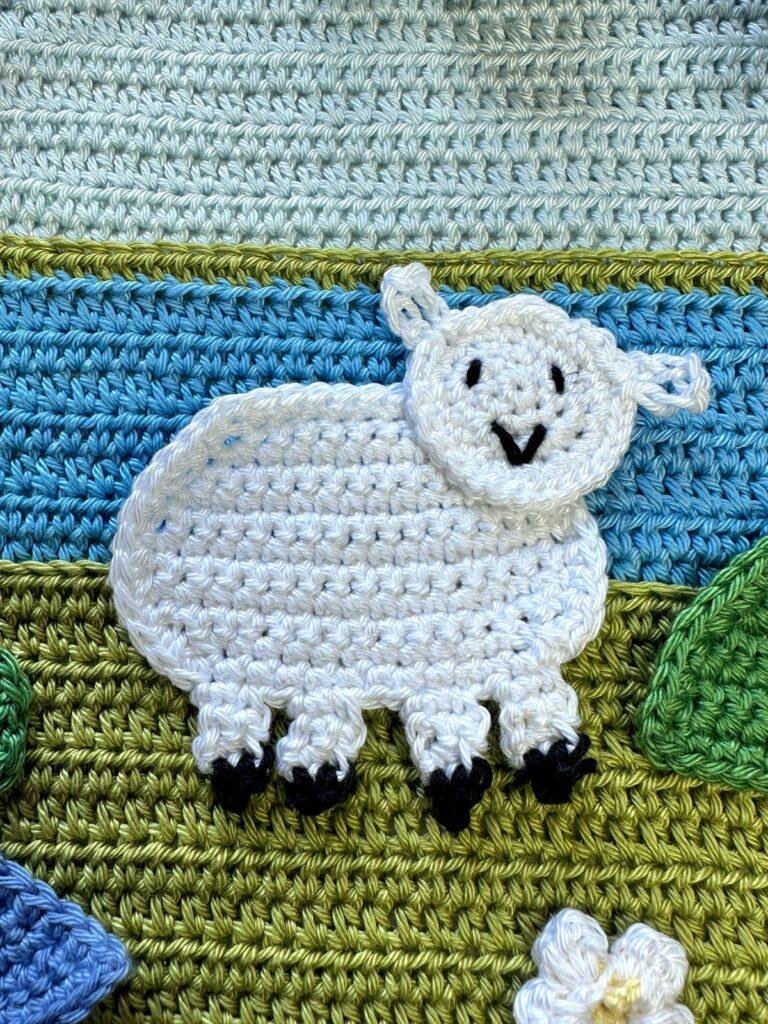
If you haven’t already made the popular Spring crochet landscapes, or the Summer crochet landscapes, they’re well worth a look too.
Autumn Landscapes Crochet Along
Let’s crochet our autumn landscape patterns together!
The Autumn Landscapes Crochet Along is your chance to stitch all three picture panels step by step, with each of the 14 appliqué motifs released one by one so we can build our scenes together.
Find out more about the seasonal landscape project and grab your Autumn Landscapes supply list here.
You can join in two ways:
📖 Option 1: Upgrade to the E-Book
You can purchase the complete Autumn Landscapes Crochet Picture pattern e-book, which includes all three background patterns, all 14 appliqué motifs in one place, a printable format, stitch tutorials, and both US and UK crochet terms.
🌼 Option 2: Free Crochet Along on the Blog
You can also follow the entire crochet picture pattern for free on the blog, with each background and motif released on the dates below.
Join the Concrete Gems Crochet Community for pattern support throughout the CAL and beyond!
🗓 CAL Release Schedule
Background panels: Now live – in this blogpost!
Appliqué Motifs
- Pumpkin (Small & Large) with Vines — coming soon!
- Corn on the Cob — coming soon!
- Oak Leaf — coming soon!
- Birch Leaf — coming soon!
- Maple Leaf — coming soon!
- Rose Leaf & Rosehip Sprig — coming soon!
- Squirrel — coming soon!
- Hedgehog — coming soon!
- Toadstool
- Acorn
- Harvest Moon — pattern included further down this page
Stitch at your own pace or follow along week by week, this modular crochet landscape pattern is designed to be flexible, creative and relaxing.
Yarn
For this crochet landscape, you’ll need small amounts of Scheepjes Catona, 100% Mercerized Cotton (50g/1.76oz, 137yds/125m) in the following colours:
Yarn A: Lime 512, Yarn B: Topaz 179, Yarn C: Lemon 280, Yarn D: Yellow Gold 208, Yarn E: Sweet Orange 411, Yarn F: Rust 388, Yarn G: Bluebird 247, Yarn H: Camel 502, Yarn I: Lime Juice 592, Yarn J: Sage Green 212, Yarn K: Bluebell 173, Yarn L: Hazelnut 503, Yarn M: Caramel 506, Yarn N: Snow White 106, Yarn O: Fir 525, Yarn P: Jet Black 110, Yarn Q: Primrose 522
If you’re worried this is a lot, don’t worry! You can easily combine colours to reduce the number, or dive into your yarn stash!
Yarn Alternatives
This pattern is designed to be used with 4ply/sport weight yarn, but you can substitute for any that you prefer. You only really need small amounts of lots of colours, so this is a great chance to use yarn from your stash. Whether you use cotton, acrylic or wool, just remember to adjust your hook size to match if necessary.
Here are a few alternative options:
Yarn and Colors Must-Have, 100% Cotton (50g/1.76oz, 125m/137yds)
Comfy Sport, 75% Pima Cotton, 25% Acrylic (50g/1.76oz, 125m/136yds)
Premier Cotton Fair Solids, 52% cotton/48% acrylic (100g/3.5oz, 290m/317yds)
Supplies you will need
- 3.0mm Crochet Hook or hook needed to match gauge
- A tapestry needle for working in ends
- Scissors
- Stitch markers
- Optional extras if you intend to hang your picture set may include frame, dowelling or similar
Sizing
Each picture measures 9.5in (24cm) wide by 9.75in (25cm) tall.
Mix and Match Your Autumn Crochet Picture
This autumn crochet picture pattern set is designed to be entirely yours. Choose your own colours, decide which of the 14 appliqué motifs you want to use, and arrange them however feels right for your scene.
Go heavy on pumpkins and vines for a harvest feel, scatter leaves and acorns for something more woodland, or bring in the squirrel, hedgehog and toadstool for a bit of character. However you build it, no two finished Autumn Landscapes need to look the same.
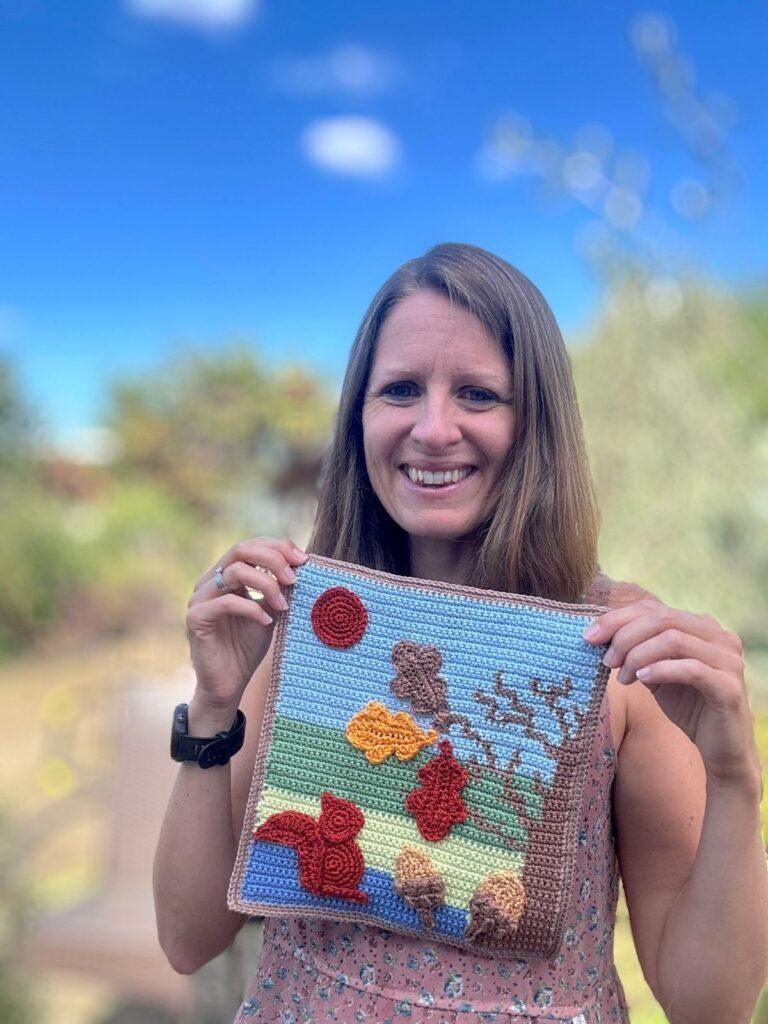
My advice is to crochet the backgrounds first, then start with one or two favourite motifs before adding more until you’re happy with how the scene looks. Or use the photos here to follow my own layout.
Tension
Gauge: 24 sts and 26 rows over single crochet using 3mm hook = 4 x 4in (10 x 10cm). However tension is not important for this project.
Stitch Abbreviations
- 3dc-cl – 3 double crochet cluster
- blo – back loop only
- bob – bobble stitch
- ch(s) – chain(s)
- dc – double crochet
- fptr – front post treble crochet
- hdc – half double crochet
- hdc2tog – half double crochet 2 together
- MR – magic ring
- rep – repeat
- RS – right side
- sc – single crochet
- sc2tog – single crochet 2 together
- slst – slip stitch
- sp – space
- st(s) – stitch(es)
- tr – treble crochet
- trtr – triple treble crochet
- WS – wrong side
- […] – stitch count
- * – repeat the instructions from *
Crochet Stitches
Magic Ring (MR)
The magic ring is a fantastic way to start crocheting in amigurumi, and any crochet in the round. It can be a bit complicated though, so do check out my YouTube tutorial above for a visual guide.
- Lay the tail end of the yarn over your palm and wrap the ball end around your first 2 fingers. Cross the yarn over and hold that point with your thumb and forefinger.
- Pull the loop off your fingers, insert your hook into the hole and grab the ball end of the yarn with your hook.
- Pull the yarn back through the loop. At this point, readjust your hand so you are holding the yarn as you normally would.
- Put your middle finger and ring finger into the loop to hold it. Then yarn over and pull through to secure your ring.
Watch a video tutorial of the Magic Ring
Stacked double crochet
The stacked dc is a lovely alternative to a turning chain. It creates a cleaner, straighter edge for your crochet projects without gaps or uneven edges. To create a stacked treble, simply stack another single crochet on top.
- Insert your hook straight into the very first st of the row/round without chaining first.
- Yarn over and pull through, then yarn over and pull through 2 (completing a single crochet).
- Insert your hook now into the vertical bar of the single crochet st that is furthest from your hook side.
- Yarn over and pull through, then yarn over and pull through 2 (completing a stacked double crochet).
Watch how to do a stacked double crochet
Single crochet 2 together (sc2tog)
A single crochet 2 together is also known as a decrease and it is used to decrease the number of stitches on a row. By using an sc2tog you will go from 2 sts down to 1 st and we use this in this pattern to create the tree shape.
- Insert hook into the next st.
- Yarn over and pull through.
- Insert your hook into the next st.
- Yarn over and pull through (you will now have 3 loops on your hook rather than the normal 2 for a single crochet).
- Yarn over and pull through all 3 loops on your hook.
See how to do the single crochet two together here.
Puff stitch
Yarn over and insert hook into st, yarn over and pull through a loop, making sure to pull it up to the full height of the row, (yarn over and insert hook into same st, yarn over and pull through a loop) twice, yarn over and pull through all 7 loops on the hook, chain 1 to secure the stitch. The final chain does not count as a stitch.
3 treble crochet cluster (3tr-cl)
Yarn over and insert hook into st, yarn over and pull through a loop, yarn over and pull through two loops. (Yarn over and insert into same st, yarn over and pull through a loop, yarn over and pull through two loops) twice. Yarn over and pull through all 4 loops to complete.
Triple treble crochet (trtr)
Yarn over four times and insert hook into st, yarn over and pull through a loop, (yarn over and pull through 2 loops) five times.
Bobble stitch
- Yarn over hook and insert hook into next stitch
- Yarn over and pull through (there will be 3 loops on your hook)
- Yarn over and pull through two loops (there will be 2 loops on your hook)
- Yarn over and insert hook into same stitch
- Yarn over and pull through
- Yarn over and pull through two loops
- Repeat steps 4 to 6, three more times (there will be 6 loops on your hook)
- Yarn over and pull through all loops on your hook
Watch a YouTube tutorial here about different ways to make a bobble stitch.
Pattern Notes
Be sure to read through these notes before you start your crochet picture pattern – they will make it so much easier to understand the pattern!
- Read through the pattern completely before starting and refer to the stitch tutorials as needed.
- Ch2 and ch3 counts as a st, unless otherwise noted. Ch1 does not count as a st at the start of rows or rounds, but counts as a st within a row.
- Where you are required to start by working a sc in second ch from hook, the skipped ch does not count as a st.
- Stitch counts are given in this pattern in [ ] at the end of each row or round. Where no stitch count is given, it is the same as the previous row or round.
- Some motifs require you to work in continuous spirals, whilst others are worked in joined rounds. To work in a continuous spiral, do not join to the first st at the end of a round, simply work the first st of the next round as directed, thus creating a spiral shape.
- When sewing parts of motifs together, use a matching coloured length of yarn and a needle. Use a basic running stitch or whip stitch as appropriate to sew the parts into place.
Prefer a Video Tutorial?
If you prefer crocheting from a video tutorial, watch as I show you how to crochet the three autumn landscape backgrounds. There are also videos for some of the trickier motifs, linked on the individual blogposts.
Free Fall Crochet Patterns for Autumn
US Terminology.
Not ready to make it yet? Summarise and save this post for later:
To unlock the free, exclusive content from Concrete Gems Crochet, all you have to do is enter your email address and create a password in the box below.
Every time you see Grow Exclusive Content from then on, you will be able to log in with your username and password and view the content. This also applies on other blogs, who use Grow.
Thank you for subscribing! I hope you enjoy the free patterns on this site. I can’t wait to see what you create! Please do share your crochet makes tagging @concretegemscrochet
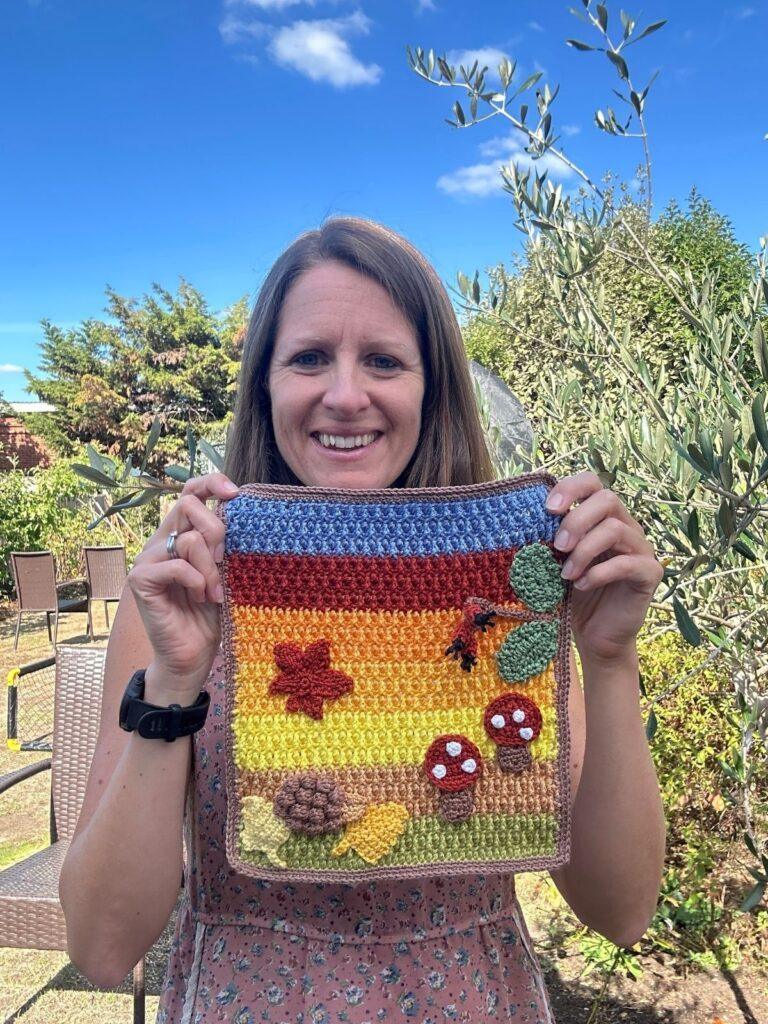
Background 1
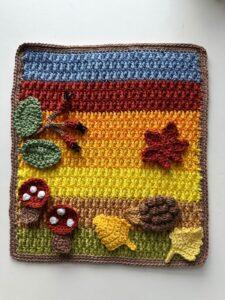
This Background uses the following yarns: Yarn A: Lime 512, Yarn B: Topaz 179, Yarn C: Lemon 280, Yarn D: Yellow Gold 208, Yarn E: Sweet Orange 411, Yarn F: Rust 388, Yarn G: Bluebird 247.
Row 1 (RS): using yarn A, ch51, dc in fourth ch from hook and each across, turn. [49]
Row 2: ch1, sc in each st across, turn.
Row 3: stacked dc in first st, *fptr in dc 2 rows below, dc in next st, rep from * across, turn.
Row 4: rep Row 2.
Row 5: ch2 (does not count as a st), fptr in first dc 2 rows below, *dc in next st, fptr in dc 2 rows below, rep from * across, changing to yarn B on the last yarn over of the last st, turn.
Row 6: rep Row 2.
Row 7: stacked dc in first st, *fptr in dc 2 rows below, dc in next st, rep from * across, turn.
Row 8: rep Row 2.
Row 9: ch2 (does not count as a st), fptr in first dc 2 rows below, *dc in next st, fptr in dc 2 rows below, rep from * across, turn.
Row 10: rep Row 2.
Row 11: stacked dc in first st, *fptr in dc 2 rows below, dc in next st, rep from * across, changing to yarn C on the last yarn over of the last st, turn.
Rows 12-14: rep Rows 8-10.
Don’t forget to check out the Spring Landscapes Crochet Picture Set too!
Rows 15-16: rep Rows 7-8.
Row 17: ch2 (does not count as a st), fptr in first dc 2 rows below, *dc in next st, fptr in dc 2 rows below, rep from * across, changing to yarn D on the last yarn over of the last st, turn.
Rows 18-22: rep Rows 6-10.
Row 23: stacked dc in first st, *fptr in dc 2 rows below, dc in next st, rep from * across, changing to yarn E on the last yarn over of the last st, turn.
Rows 24-26: rep Rows 8-10.
Rows 27-28: rep Rows 7-8.
Row 29: ch2 (does not count as a st), fptr in first dc 2 rows below, *dc in next st, fptr in dc 2 rows below, rep from * across, changing to yarn F on the last yarn over of the last st, turn.
Rows 30-34: rep Rows 6-10.
Row 35: stacked dc in first st, *fptr in dc 2 rows below, dc in next st, rep from * across, changing to yarn G on the last yarn over of the last st, turn.
Rows 36-38: rep Rows 8-10.
Rows 39-41: rep Rows 7-9.
Fasten off and weave in ends.
Continue to border instructions.
Background 2
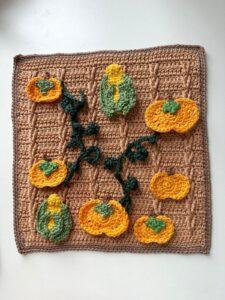
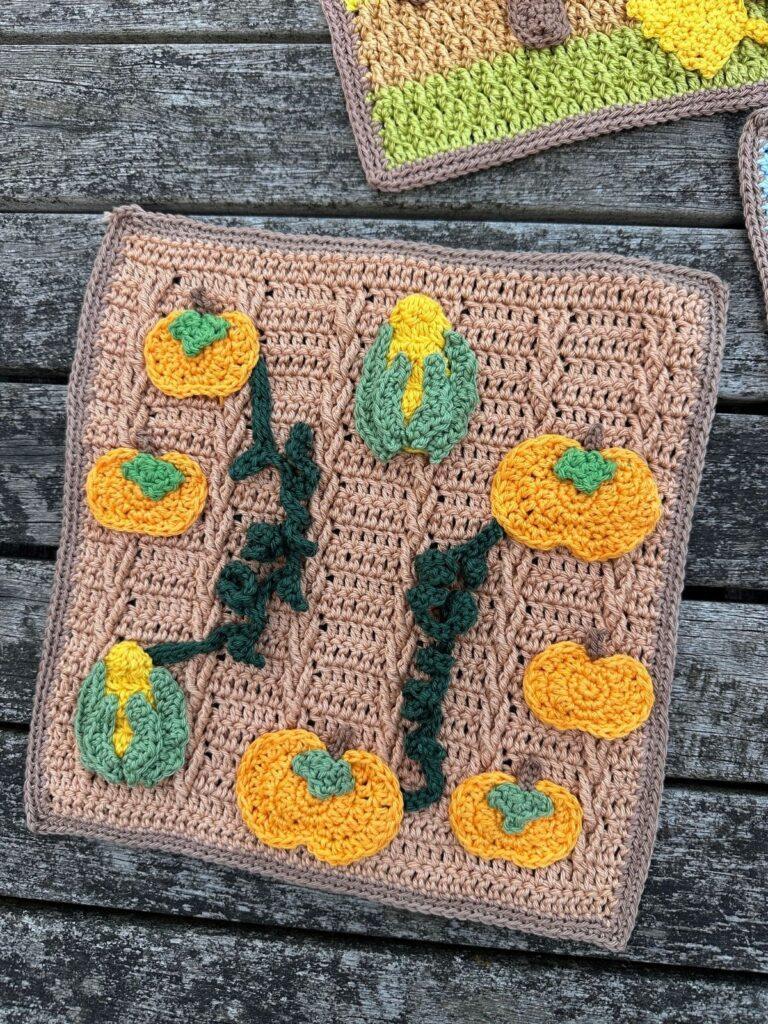
This Background uses the following yarns: Yarn H: Camel 502
Row 1: using yarn H, ch50, dc in fourth ch from hook and each across, turn. [48]
Rows 2-3: stacked dc in first st, dc in each st across, turn.
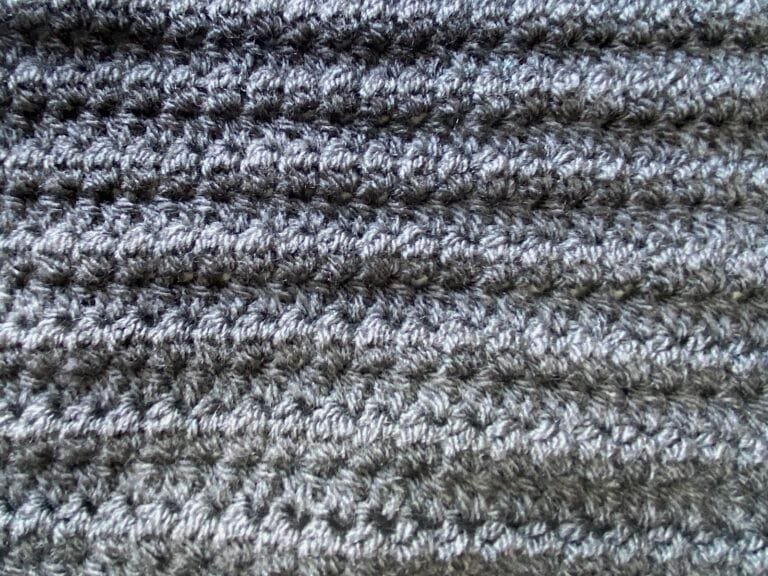
Row 4: stacked dc in first st, dc in next st, *trtr around post of st located one st to the left in Row 2, dc in next st, trtr around post of same st as previous trtr, dc in next 5 sts, rep from * to last 6 sts, trtr around post of st located one st to the left in Row 2, dc in next st, trtr around post of same st as previous trtr, dc in next 3 sts, turn.
Row 5: stacked dc in first st, dc in each st across, turn.
Rows 6-25: rep Rows 4-5.
Fasten off and weave in ends.
Continue to Border instructions.
Background 3
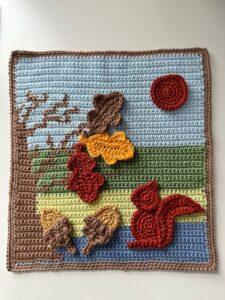
This Background uses the following yarns: Yarn G: Bluebird 247, Yarn I: Lime Juice 592, Yarn J: Sage Green 212, Yarn K: Bluebell 173, Yarn L: Hazelnut 503.
This background uses tapestry crochet. There is a colour chart in the pdf version of the pattern if you prefer to work from that. Change colour on the last yarn over of the stitch before the new colour.
Row 1 (RS): using yarn G, ch51, sc in second ch from hook and next 36 chs, change to yarn L, sc in next 13 chs, turn. [50]
Row 2: ch1, sc in next 13 sts, change to yarn G, sc in next 37 sts, turn.
Row 3: ch1, sc in next 39 sts, change to yarn L, sc in next 11 sts, turn.
Row 4: ch1, sc in next 11 sts, change to yarn G, sc in next 39 sts, turn.
Row 5: ch1, sc in next 39 sts, change to yarn I, sc in next 2 sts, change to yarn L, sc in next 9 sts, turn.
Row 6: ch1, sc in next 9 sts, change to yarn I, sc in next 4 sts, change to yarn G, sc in next 37 sts, turn.
Row 7: ch1, sc in next 37 sts, change to yarn I, sc in next 5 sts, change to yarn L, sc in next 8 sts, turn.
Row 8: ch1, sc in next 8 sts, change to yarn I, sc in next 10 sts, change to yarn G, sc in next 32 sts, turn.
Row 9: ch1, sc in next 32 sts, change to yarn I, sc in next 10 sts, change to yarn L, sc in next 8 sts, turn.
Row 10: ch1, sc in next 8 sts, change to yarn I, sc in next 18 sts, change to yarn G, sc in next 24 sts, turn.
Row 11: ch1, sc in next 16 sts, change to yarn I, sc in next 26 sts, change to yarn L, sc in next 8 sts, turn.
Row 12: ch1, sc in next 8 sts, change to yarn I, sc in next 42 sts, turn.
Row 13: ch1, sc in next 42 sts, change to yarn L, sc in next 8 sts, turn.
Row 14: rep Row 12.
Row 15: ch1, sc in next 44 sts, change to yarn L, sc in next 6 sts, turn.
Row 16: ch1, sc in next 6 sts, change to yarn I, sc in next 44 sts, turn.
Rows 17-20: rep Rows 15-16. Change to yarn J.
Row 21: ch1, sc in next 44 sts, change to yarn L, sc in next 6 sts, turn.
Row 22: ch1, sc in next 9 sts, change to yarn J, sc in next 14 sts, change to yarn L, sc in next st, change to yarn J, sc in next 26 sts, turn.
Row 23: ch1, sc in next 26 sts, change to yarn L, sc in next st, change to yarn J, sc in next 3 sts, change to yarn L, sc in next 2 sts, change to yarn J, sc in next 7 sts, change to yarn L, sc in next 3 sts, change to yarn J, sc in next 2 sts, change to yarn L, sc in next 6 sts, turn.
Don’t forget to check out the Summer Landscapes Crochet Picture Set too!
Row 24: ch1, sc in next 6 sts, change to yarn J, sc in next 4 sts, change to yarn L, sc in next 4 sts, change to yarn J, sc in next 4 sts, change to yarn L, sc in next st, change to yarn J, sc in next 4 sts, change to yarn L, sc in next st, change to yarn J, sc in next 26 sts, turn.
Row 25: ch1, sc in next 22 sts, change to yarn L, sc in next 15 sts, change to yarn J, sc in next 2 sts, change to yarn L, sc in next st, change to yarn J, sc in next 4 sts, change to yarn L, sc in next 6 sts, turn.
Row 26: ch1, sc in next 7 sts, change to yarn J, sc in next 7 sts, change to yarn L, sc in next st, change to yarn J, sc in next 4 sts, change to yarn L, sc in next st, change to yarn J, sc in next 30 sts, turn.
Row 27: ch1, sc in next 28 sts, change to yarn L, sc in next 3 sts, change to yarn J, sc in next 11 sts, change to yarn L, sc in next 3 sts, change to yarn J, sc in next st, change to yarn L, sc in next 4 sts, turn.
Row 28: ch1, sc in next 4 sts, change to yarn J, sc in next 2 sts, change to yarn L, sc in next 2 sts, change to yarn J, sc in next 13 sts, change to yarn L, sc in next sc, change to change J, sc in next 28 sts, turn.
Row 29: ch1, sc in next 28 sts, change to yarn L, sc in next st, change to yarn J, sc in next 9 sts, change to yarn L, sc in next 5 sts, change to yarn J, sc in next 3 sts, change to yarn L, sc in next 4 sts, turn.
Row 30: ch1, sc in next 4 sts, change to yarn J, sc in next 3 sts, change to yarn L, sc in next 3 sts, change to yarn J, sc in next 40 sts, turn.
Row 31: ch1, sc in next 31 sts, change to yarn L, sc in next 4 sts, change to yarn J, sc in next 4 sts, change to yarn L, sc in next 2 sts, change to yarn J, sc in next 5 sts, change to yarn L, sc in next 4 sts, turn.
Row 32: ch1, sc in next 6 sts, change to yarn J, sc in next 4 sts, change to yarn L, sc in next st, change to yarn J, sc in next 4 sts, change to yarn L, sc in next st, change to yarn J, sc in next 34 sts, turn.
Row 33: ch1, sc in next 32 sts, change to yarn L, sc in next 8 sts, change to yarn J, sc in next 4 sts, change to yarn L, sc in next st, change to yarn J, sc in next 2 sts, change to yarn L, sc in next 3 sts, turn.
Row 34: ch1, sc in next 3 sts, change to yarn K, sc in next 2 sts, change to yarn L, sc in next st, change to yarn K, sc in next 4 sts, change to yarn L, sc in next st, change to yarn K, sc in next 2 sts, change to yarn L, sc in next st, change to yarn K, sc in next 2 sts, change to yarn L, sc in next st, change to yarn K, sc in next 33 sts, turn.
Row 35: ch1, sc in next 35 sts, change to yarn L, sc in next 2 sts, change to yarn K, sc in next 2 sts, change to yarn L, sc in next 2 sts, change to yarn K, sc in next 6 sts, change to yarn L, sc in next 3 sts, turn.
Row 36: ch1, sc in next 3 sts, change to yarn K, sc in next 6 sts, change to yarn L, sc in next st, change to yarn K, sc in next 4 sts, change to yarn L, sc in next st, change to yarn K, sc in next 35 sts, turn.
Row 37: ch1, sc in next 33 sts, change to yarn L, sc in next 3 sts, change to yarn K, sc in next 4 sts, change to yarn L, sc in next st, change to yarn K, sc in next 6 sts, change to yarn L, sc in next 3 sts, turn.
Row 38: ch1, sc in next 5 sts, change to yarn K, sc in next 11 sts, change to yarn L, sc in next 3 sts, change to yarn K, sc in next 2 sts, change to yarn L, sc in next 3 sts, change to yarn K, sc in next 26 sts, turn.
Row 39: ch1, sc in next 28 sts, change to yarn L, sc in next st, change to yarn K, sc in next 2 sts, change to yarn L, sc in next st, change to yarn K, sc in next 12 sts, change to yarn L, sc in next 6 sts, turn.
Row 40: ch1, sc in next 3 sts, change to yarn K, sc in next 2 sts, change to yarn L, sc in next 4 sts, change to yarn K, sc in next 9 sts, change to yarn L, sc in next 5 sts, change to yarn K, sc in next 27 sts, turn.
Row 41: ch1, sc in next 27 sts, change to yarn L, sc in next st, change to yarn K, sc in next 6 sts, change to yarn L, sc in next 4 sts, change to yarn K, sc in next 3 sts , change to yarn L, sc in next st, change to yarn K, sc in next 5 sts, change to yarn L, sc in next 3 sts, turn.
Row 42: ch1, sc in next st, change to yarn K, sc in next st, change to yarn L, sc in next st, change to yarn K, sc in next 5 sts, change to yarn L, sc in next 5 sts, change to yarn K, sc in next st, change to yarn L, sc in next st, change to yarn K, sc in next 7 sts, cnage to yarn L, sc in next st, change to yarn K, sc in next 27 sts, turn.
Row 43: ch1, sc in next 35 sts, change to yarn L, sc in next st, change to yarn K, sc in next 5 sts, change to yarn L, sc in next st, change to yarn K, sc in next 4 sts, change to yarn L, sc in next 2 sts, change to yarn K, sc in next st, change to yarn L, sc in next st, turn.
Row 44: ch1, sc in next st, change to yarn K, sc in next 2 sts, change to yarn L, sc in next st, change to yarn K, sc in next 4 sts, change to yarn L, sc in next 4 sts, change to yarn K, sc in next 2 sts, change to yarn L, sc in next 4 sts, change to yarn K, sc in next 32 sts, turn.
Row 45: ch1, sc in next 32 sts, change to yarn L, sc in next st, change to yarn K, sc in next 5 sts, change to yarn L, sc in next st, change to yarn K, sc in next 5 sts, change to yarn L, sc in next 3 sts, change to yarn K, sc in next st, change to yarn L, sc in next 2 sts, change to yarn K, turn.
Row 46: ch1, sc in next st, change to yarn L, sc in next st, change to yarn K, sc in next 3 sts, change to yarn L, sc in next st, change to yarn K, sc in next 5 sts, change to yarn L, sc in next 4 sts, change to yarn K, sc in next 35 sts, turn.
Row 47: ch1, sc in next 35 sts, change to yarn L, sc in next st, change to yarn K, sc in next 5 sts, change to yarn L, sc in next 4 sts, change to yarn K, sc in next 5 sts, turn.
Row 48: ch1, sc in next 3 sts, change to yarn L, sc in next 3 sts, change to yarn K, sc in next 2 sts, change to yarn L, sc in next sc, change to yarn K, sc in next 5 sts, change to yarn L, sc in next st, change to yarn K, sc in next 35 sts, turn.
Row 49: ch1, sc in next 35 sts, change to yarn L, sc in next st, change to yarn K, sc in next 5 sts, change to yarn L, sc in next st, change to yarn K, sc in next 4 sts, change to yarn L, sc in next st, change to yarn K, sc in next 3 sts, turn.
Row 50: ch1, sc in next 3 sts, change to yarn L, sc in next st, change to yarn K, sc in next 46 sts, turn.
Rows 51-60: ch1, sc in each st across, turn.
Fasten off and weave in ends.
Continue to Border instructions.
Border Instructions
The border of each background is worked using yarn M: Caramel 506
Round 1: using yarn M, join yarn in the first st after any corner to work down the long edge, work sc evenly along the row ends to corner, ch1, turn to work 1sc in each st across bottom edge, ch1, turn to work sc evenly along the row ends to next corner, ch1, turn to work 1sc in each st along top edge, ch1, sl st in first st to join.
Note: Down the sides, you may need to work more than one sc in a row end to keep an even spacing. Do not worry too much about how many stitches though, as long as the edges are even.
Round 2: ch1, *sc blo in each st to corner ch, (sc, ch1, sc) in blo of corner ch, rep from * around, sl st in first st to join.
Fasten off and weave in ends.
Block Backgrounds to size.
Harvest Moon Motif
This motif uses Yarn F: Rust 388
Make a MR. Work in continuous spirals.
Round 1: 6sc in MR. [6]
Round 2: 2sc in each st around. [12]
Round 3: (2sc in next st, sc in next st) rep around. [18]
Round 4: (sc in next 2 sts, 2sc in next st) rep around. [24]
Round 5: (sc in next st, 2sc in next st, sc in next 2 sts) rep around. Work a sl st in first 2 sts of the next round to smooth off the circle. [30]
Fasten off and weave in ends.
Motifs and Finishing
Now that you’ve completed the backgrounds, it’s time to crochet the appliqué motifs to go on them, including the harvest moon above. The rest of the motifs will be released gradually on the blog, or you can upgrade to the premium PDF for everything in one place.
Once you’ve made your motifs, arrange them to your liking on your backgrounds and sew (or glue) them in place. Add embroidery details as desired (such as eyes), and hang your pictures using dowels or frames, or sew them together however you prefer. Once you have all four seasons, you could even join them into a blanket.
Check out my other crochet patterns too for more crochet inspiration, and keep an eye out for the winter landscapes to complete the set.
Pattern help
There’s a lot more detail in the premium PDF, including photos, stitch tutorials, colour change advice, and a guide to my layout, plus it’s yours to print out and keep.
Also check out the stitch tutorials on my YouTube channel for extra guidance.
If you are struggling with the pattern, please don’t hesitate to reach out. Find me on Facebook or Instagram @concretegemscrochet or drop me a message.
If you enjoyed making your crochet picture set pattern please consider sharing it to social media tagging @concretegemscrochet or come and join the Concrete Gems Crochet Community to share in the joy of crochet with me.
FAQs
A: This crochet picture pattern is suitable for confident beginners and intermediate crocheters. The background panels use simple stitches with a few variations, and the appliqué motifs are worked separately and sewn on. Stitch tutorials and videos are included to help with some of the techniques used in the pattern.
A: This crochet landscape pattern includes three coordinating panels: an autumn sunset, a cornfield, and a woodland. The panels are designed to sit side by side to create an autumn landscape display.
A: Yes. The 14 crochet appliqué motifs are designed to be mix and match. You can arrange them differently on each background panel to create your own custom crochet picture art, making every finished autumn landscape unique.
A: Each motif is crocheted separately and then sewn onto the finished background panels using a yarn needle. Positioning is flexible, so you can arrange your layout before permanently attaching the pieces. If you’d rather not sew, fabric glue works too.
A: The autumn landscapes are designed as 3 individual panels. Use them as wall hangings, individually or joined together, frame them or add a backing, or join them with the other seasons to create a beautiful, unique crochet blanket or bedspread.
A: Not at all. You can use as many or as few as you like, a single pumpkin and a scattering of leaves works just as well as a fully decorated scene.
Other Crochet Patterns you Might Enjoy
If you enjoyed making this textured crochet picture, then you might also like these free crochet home decor patterns:
- Woodland Advent Calendar – featuring more fun appliqué motifs on a Christmas tree wall hanging
- Rustic Crochet Pumpkins – with a gorgeous textured stitch for your fall decor
- Autumn Crochet Blanket Pattern – inspired by autumn colours and bonfire night
- Find more nature crochet patterns for your crochet enjoyment!
Thanks for reading and happy crocheting! 🧶