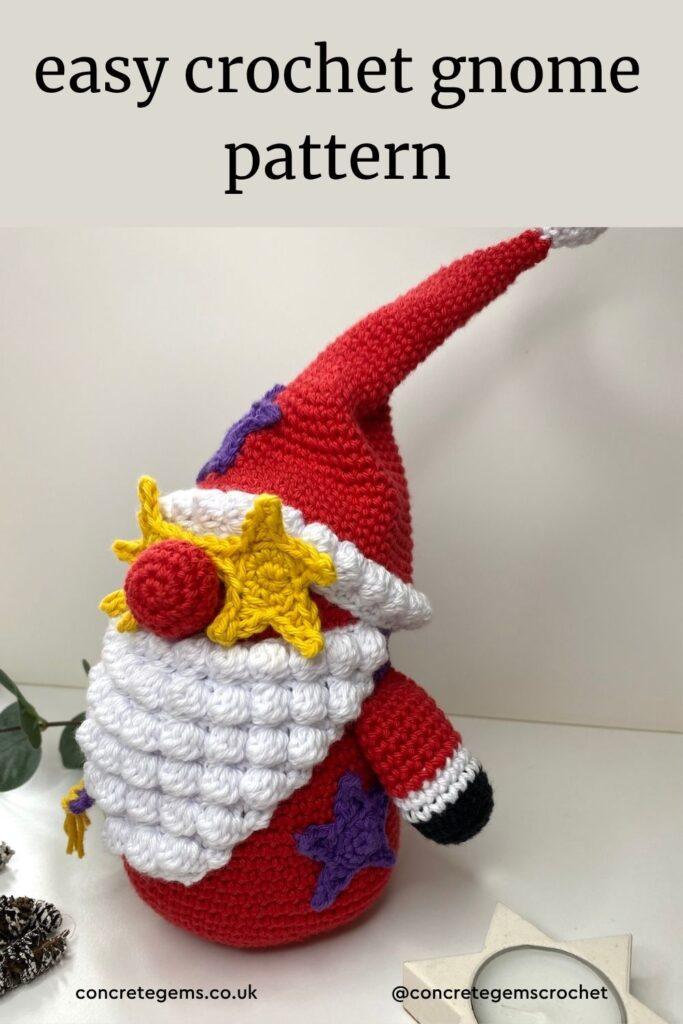
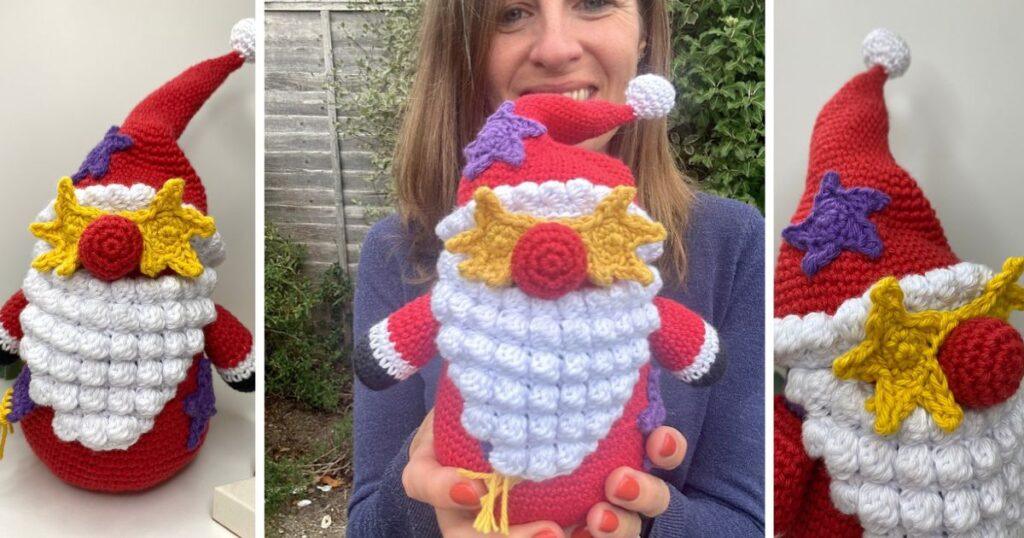
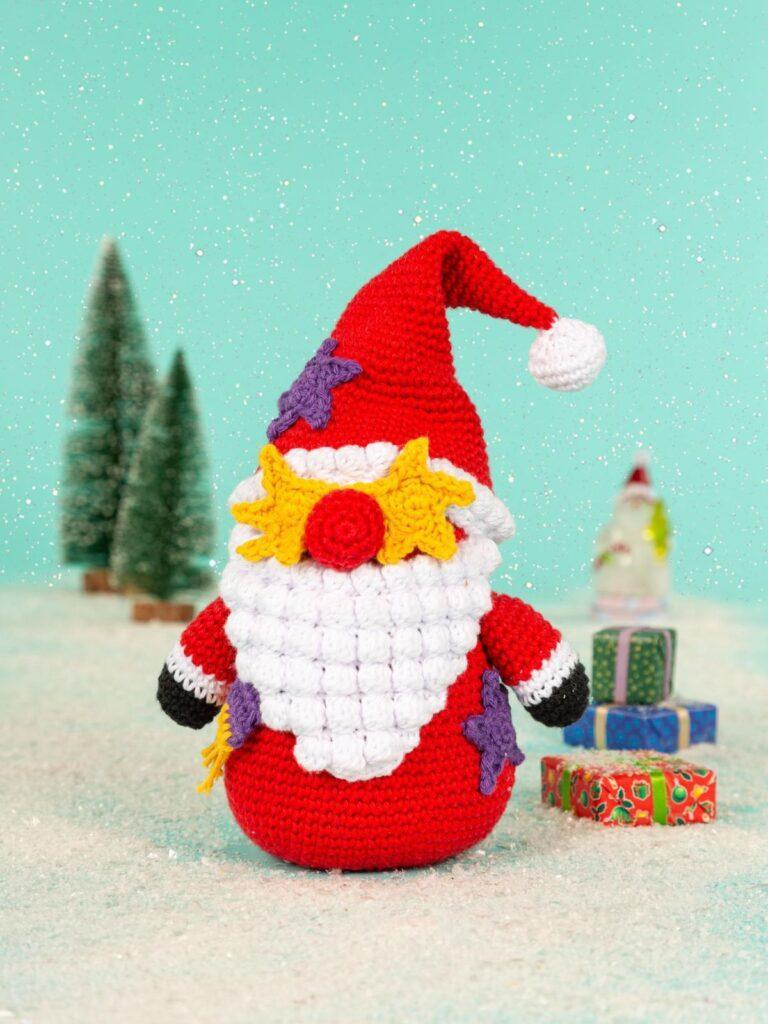
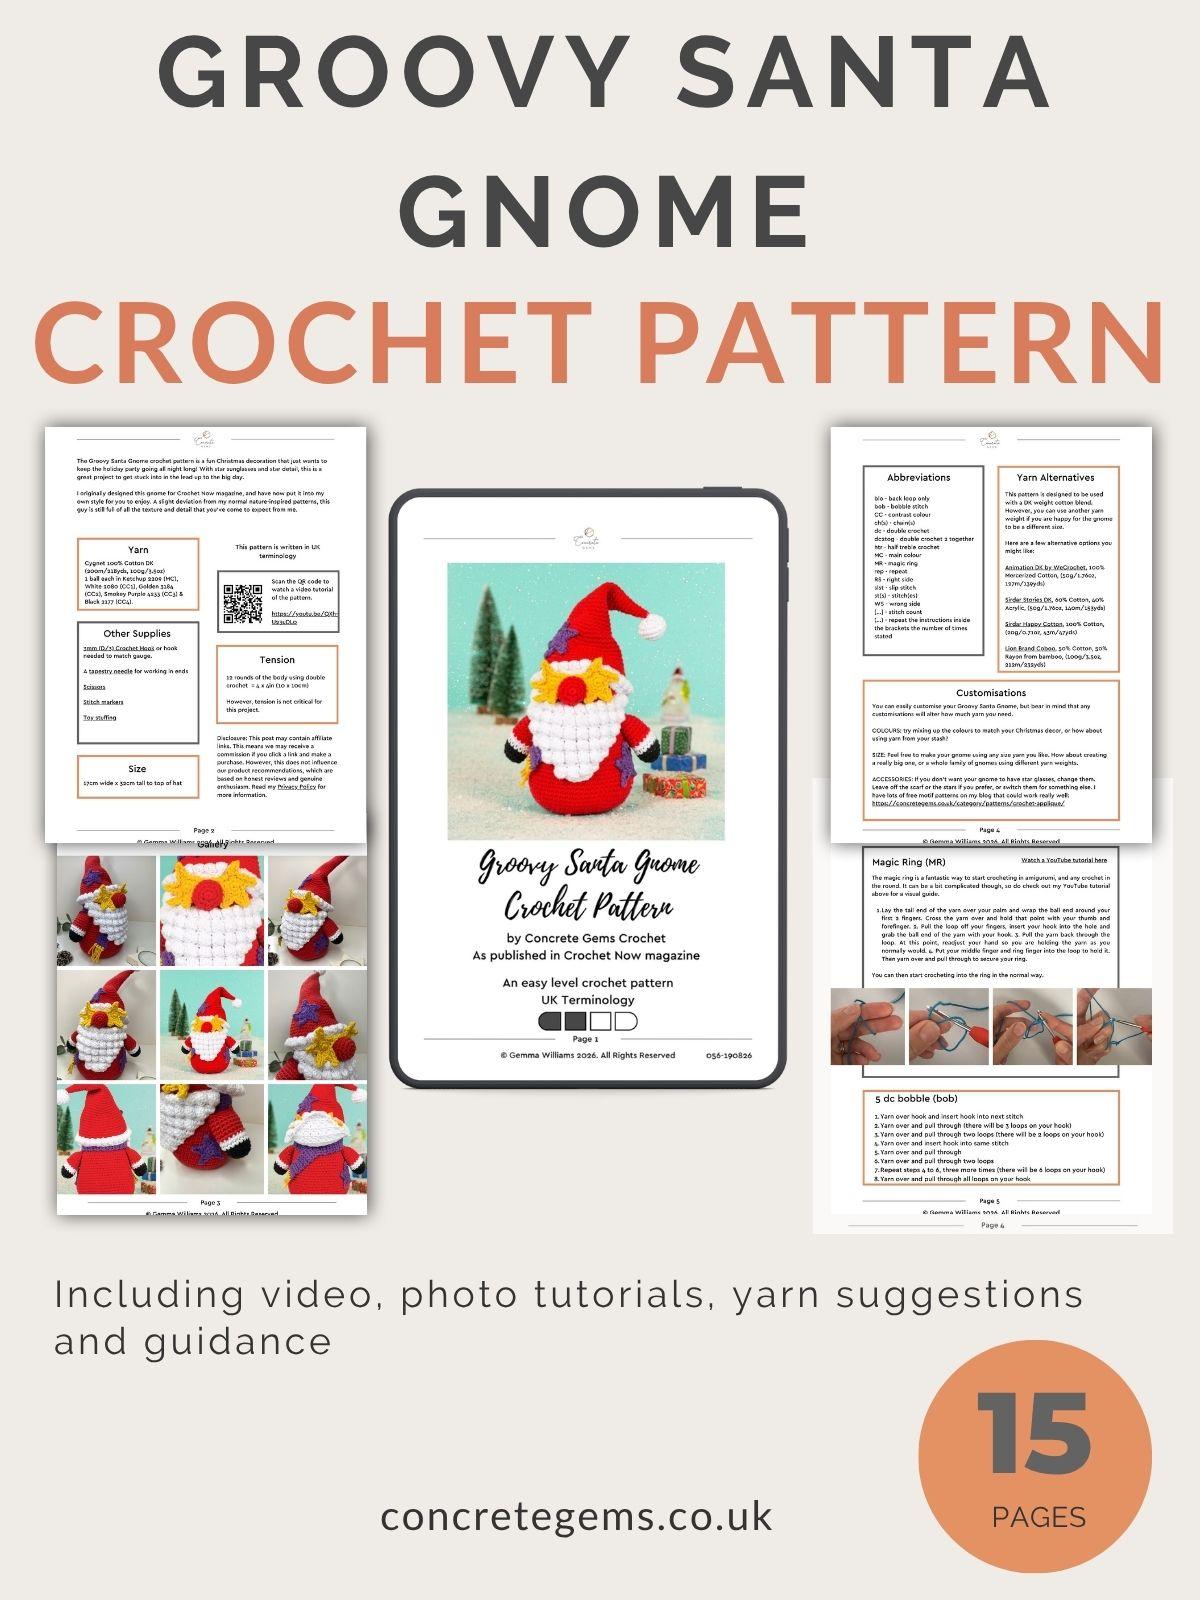
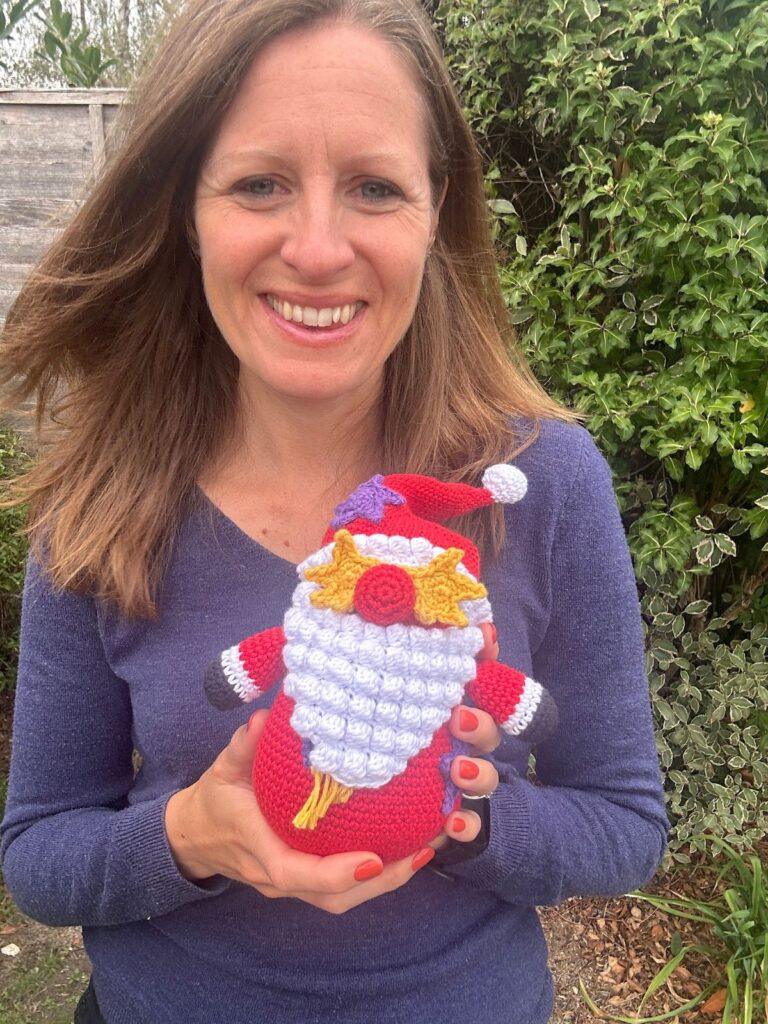
Make the cutest Christmas gnome with this free crochet Christmas gnome pattern! With groovy star sunglasses, a fluffy beard and a cosy scarf, he’ll be heading up the Christmas disco. This easy amigurumi Santa gnome stands 32 cm tall and 17 cm wide, and he’s made from lots of little pieces that join on to bring him to life.
This crochet Santa free pattern uses just basic single crochet stitches, so it’s a lovely make for anyone comfortable with the basics. Choose different colours, yarn or accessories to make him your own. Read the free pattern below, or pick up the ad-free PDF to print and keep. He makes a fun gift, a cheerful Christmas decoration, or just a good excuse to enjoy the holidays.
Disclosure: This post may contain affiliate links. This means we may receive a commission if you click a link and make a purchase. However, this does not influence our product recommendations, which are based on honest reviews and genuine enthusiasm. Read my Privacy Policy for more information.
Quick Look at the Crochet Christmas Gnome Pattern
- Skill level: Easy – using basic crochet stitches
- Crochet Stitch: Single crochet, worked in the round (amigurumi style)
- Size: 17cm wide x 32cm tall to top of hat
- Yarn: Cygnet 100% Cotton DK
- Hook size: 3mm
- Approx. make time: 8-12 hours
- Free Pattern in US terms: the PDF includes US and UK terms
- Perfect for: decorating for Christmas, gifting to a fun friend or selling on craft stalls
*This helps Google recognise me as a crochet designer 😊
Why you’ll Love This Crochet Christmas Gnome Pattern
- He’s full of personality. The star sunglasses, fluffy beard, cosy scarf and Santa hat give him a groovy, party-ready look that’s very different from a traditional Santa.
- It uses only basic stitches. The whole gnome is worked in single crochet, so you don’t need any fancy techniques to make him.
- The little pieces make it fun. He’s made up of lots of small parts that join on, so it’s easy to pick up and put down, and it’s very satisfying to watch him come together.
- You can make him your own. Swap the colours, choose a different cotton DK yarn, or change up the accessories to suit your own Christmas decorating.
- He works as a decoration or a gift. Stand him on a shelf, a mantelpiece or a table, or make one for a friend who loves a bit of festive fun.
- The cotton gives a neat, defined finish. The yarn holds the shapes well, so the details of his beard, glasses and stars stand out.
- He’s a good one to make for craft stalls. You’re welcome to sell the finished gnomes, as long as you credit Concrete Gems Crochet as the designer.
Fancy another Christmas crochet decoration? How about these crochet Christmas trees with poinsettia flowers?
I originally designed this gnome for Crochet Now magazine, and have now put it into my own style for you to enjoy. A slight deviation from my normal nature-inspired patterns, this guy is still full of all the texture and detail that you’ve come to expect from me.
Yarn
Cygnet 100% Cotton DK (200m/218yds, 100g/3.5oz)
1 ball each in Ketchup 2209 (MC), White 2080 (CC1), Golden 3184 (CC2), Smokey Purple 4233 (CC3) & Black 2177 (CC4).
Yarn Alternatives
This pattern is designed to be used with a DK weight cotton or cotton blend. However, you can use another yarn weight if you are happy for the gnome to be a different size.
Here are a few alternative options you might like:
- Animation DK by WeCrochet, 100% Mercerized Cotton, (50g/1.76oz, 127m/139yds)
- Sirdar Stories DK, 60% Cotton, 40% Acrylic, (50g/1.76oz, 140m/153yds)
- Sirdar Happy Cotton, 100% Cotton, (20g/0.71oz, 43m/47yds)
- Lion Brand Coboo, 50% Cotton, 50% Rayon from bamboo, (100g/3.5oz, 212m/232yds)
Supplies You Will Need
- 3mm Crochet Hook or hook needed to match gauge
- A tapestry needle for working in ends
- Scissors
- Stitch markers
- Toy stuffing
Size
Your crochet Christmas gnome measures 17cm wide and 32cm tall to top of hat.
Get the ad-free PDF here!
Upgrade to the premium PDF or you can carry on scrolling down and read the pattern for free on the blog in US crochet terms.
What You Get
✨ Ad-free, printable PDF in UK and US terms — instant download
🌸 Stitch tutorials, yarn options, and customisation
🎥 Supporting video tutorial to guide you along the way
💛 A relaxing project you can pick up and enjoy anytime
PLEASE NOTE: The premium pattern is a pdf crochet pattern, written in English. It is not a finished project. You will receive a digital download upon completion of purchase. The blogpost contains ads which is how I am able to offer it for free.
Pattern Gauge
12 rounds of the body using single crochet = 4 x 4in (10 x 10cm)
However, tension is not critical for this project.
If you love the bobble stitch used in this pattern for the beard, have a look at my chocolate crochet stocking ornament pattern.
Video Tutorial for the Free Crochet Christmas Gnome Pattern
If you prefer crocheting from a video tutorial, watch along as I show you how to crochet part 1 of the Santa gnome here:
Stitch Abbreviations
- blo – back loop only
- bob – bobble stitch
- CC – contrast colour
- ch(s) – chain(s)
- dc – double crochet
- hdc – half double crochet
- MC – main colour
- MR – magic ring
- rep – repeat
- RS – right side
- sc – single crochet (how to single crochet)
- sc2tog – single crochet 2 together
- slst – slip stitch
- st(s) – stitch(es)
- WS – wrong side
- […] – stitch count
- (…) – repeat the instructions inside the brackets the number of times stated
What Special Crochet Stitches are Used to Make this Easy Crochet Santa?
Magic Ring (MR)
The magic ring is a fantastic way to start crocheting in amigurumi, and any crochet in the round. It can be a bit complicated though, so do check out my YouTube tutorial above for a visual guide.
- Lay the tail end of the yarn over your palm and wrap the ball end around your first 2 fingers. Cross the yarn over and hold that point with your thumb and forefinger.
- Pull the loop off your fingers, insert your hook into the hole and grab the ball end of the yarn with your hook.
- Pull the yarn back through the loop. At this point, readjust your hand so you are holding the yarn as you normally would.
- Put your middle finger and ring finger into the loop to hold it. Then yarn over and pull through to secure your ring.
You can then start crocheting into the ring in the normal way.
It can be tricky to visualise so check out a Youtube video of the magic ring here.
5 dc bobble (bob)
- Yarn over hook and insert hook into next stitch
- Yarn over and pull through (there will be 3 loops on your hook)
- Yarn over and pull through two loops (there will be 2 loops on your hook)
- Yarn over and insert hook into same stitch
- Yarn over and pull through
- Yarn over and pull through two loops
- Repeat steps 4 to 6, three more times (there will be 6 loops on your hook)
- Yarn over and pull through all loops on your hook
Customising Your Crochet Gnome How You Like It
You can easily customise your groovy crochet Santa Gnome, but bear in mind that any customisations will alter how much yarn you need.
COLOURS: try mixing up the colours to match your Christmas decor, or how about using yarn from your stash?
SIZE: Feel free to make your gnome using any size yarn you like. How about creating a really big one, or a whole family of gnomes using different yarn weights.
ACCESSORIES: If you don’t want your gnome to have star glasses, change them. Leave off the scarf or the stars if you prefer, or switch them for something else. I have lots of free motif patterns on my blog that could work really well: https://concretegems.co.uk/category/patterns/crochet-applique/
Pattern Notes
Be sure to read through these notes before you start your Christmas Gnome — they’ll make the pattern much easier to follow.
- Read through the pattern completely before starting and refer to the stitch tutorials as needed.
- Parts made in the round are worked in the amigurumi style, in a spiral without slip stitching or turning chains.
- Use stitch markers to mark the first stitch of each round.
- Beginning ch1 does not count as a st.
- Stitch counts are given in [ ] at the end of a round. Where there is no stitch count, it is the same as the previous round.
Join the Concrete Gems Crochet Community for pattern support!
Crochet Christmas Gnome Pattern Free
US Terminology.
Not ready to start yet? Summarise and save this crochet pattern for later:
To unlock the free, exclusive content from Concrete Gems Crochet, all you have to do is enter your email address and create a password in the box below.
Every time you see Grow Exclusive Content from then on, you will be able to log in with your username and password and view the content. This also applies on other blogs, who use Grow.
Thank you for subscribing! I hope you enjoy the free patterns on this site. I can’t wait to see what you create! Please do share your crochet makes tagging @concretegemscrochet
- Round 30: (sc in next 7 sts, sc2tog) 6 times. [48]
- Round 31: (sc in next 6 sts, sc2tog) 6 times. [42]
Begin to stuff the body, continuing as you go.
- Round 32: (sc in next 5 sts, sc2tog) 6 times. [36]
- Round 33: (sc in next 5 sts, 2sc in next st) 6 times. [42]
- Round 34: (sc in next 6 sts, 2sc in next st) 6 times. [48]
- Round 35: (sc in next 7 sts, 2sc in next st) 6 times. [54]
- Rounds 36-39: sc in each st around.
- Round 40: (sc in next 7 sts, sc2tog) 6 times. [48]
- Round 41: (sc in next 6 sts, sc2tog) 6 times. [42]
- Round 42: (sc in next 5 sts, sc2tog) 6 times. [36]
- Round 43: (sc in next 4 sts, sc2tog) 6 times. [30]
- Round 44: (sc in next 3 sts, sc2tog) 6 times. [24]
- Round 45: (sc in next 2 sts, sc2tog) 6 times. [18]
- Round 46: (sc in next st, sc2tog) 6 times. [12]
Fasten off, leaving a tail. Weave tail through tops of remaining 12 sts and pull tightly to close. Weave in end securely.
If you’re enjoying this crochet gnome pattern, take a look at my other amigurumi patterns:
Scarf
With CC3, chain 5.
Row 1 (RS): Starting in 2nd ch from hook, 4sc, turn. [4]
Rows 2-60: ch1, 4sc, turn.
Fasten off.
With CC2, cut 4 lengths of 4in/10cm. Fold each in half. Insert hook into first st of last row and pull loop created by fold through. Bring the ends through the loop and tighten to create fringe. Rep with remaining lengths of CC2 across last row. Trim to neaten edges.
Use images as a guide. Wrap Scarf around neck of Body and let fringed end hang down long whilst the other end meets the side of the fringed end. Sew together at the join.
Beard
With CC1, chain 28.
- Row 1 (RS): Starting in 2nd ch from hook, sc across, turn. [27]
- Row 2: ch1, (1sc, bob) 13 times, 1sc, turn.
- Row 3: 1slst, sc across to last st, leave last st unworked, turn. [25]
- Row 4: 1slst, (1sc, bob) 11 times, 1sc, leave last st unworked, turn. [23]
- Row 5: rep Row 3. [21]
- Row 6: 1slst, (1sc, bob) 9 times, 1sc, leave last st unworked, turn. [19]
- Row 7: rep Row 3. [17]
- Row 8: 1slst, (1sc, bob) 7 times, 1sc, leave last st unworked, turn. [15]
- Row 9: rep Row 3. [13]
- Row 10: 1slst, (1sc, bob) 5 times, 1sc, leave last st unworked, turn. [11]
- Row 11: rep Row 3. [9]
- Row 12: 1slst, (1sc, bob) 3 times, 1sc, leave last st unworked, turn. [7]
- Row 13: rep Row 3. [5]
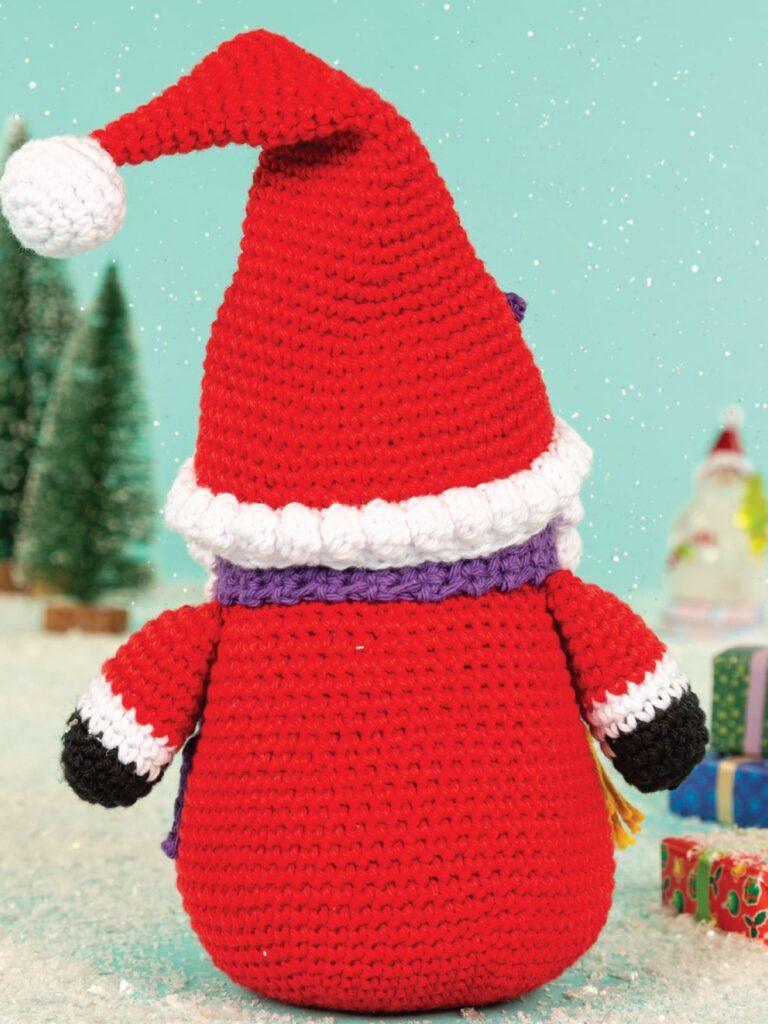
Fasten off. Sew Row 1 of Beard in place along top edge of Scarf, curving Beard slightly upwards on each end.
Nose
Using MC, make a MR.
- Round 1: 6sc in MR. [6]
- Round 2: 2sc in each st around. [12]
- Round 3: (sc in next st, 2sc in next st) 6 times. [18]
- Rounds 4-5: sc in each st around.
- Round 6: (sc, sc2tog) 6 times. [12]
Fasten off. Stuff and sew to middle of Head just above Beard.
Arms
Make 2
Using CC4, make a MR.
- Round 1: 6sc in MR. [6]
- Round 2: 2sc in each st around. [12]
- Round 3: (sc in next st, 2sc in next st) 6 times. [18]
- Rounds 4-5: sc in each st around. Change to CC1 on the last yarn over of the last st.
Fasten off CC4.
Rounds 6-7: With CC1, sc in each st around. Change to MC on the last yarn over of the last st.
Fasten off CC1.
Check out my other crochet patterns for more crochet inspiration. You might like this easy crochet hat and mittens pattern too!
Rounds 8-14: With MC, sc in each st around.
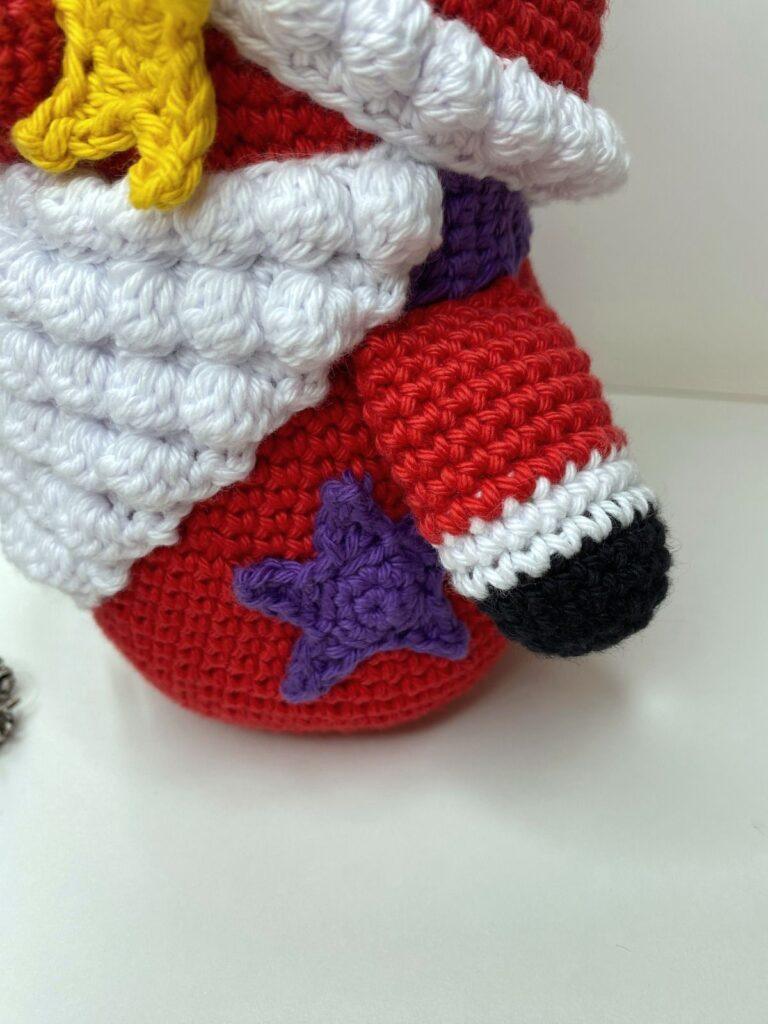
Fasten off and stuff lightly. Flatten top end and sew to side of Body directly below Scarf, working through both layers of Arm to close.
Hat
Using MC, make a MR.
Round 1: 4sc in MR. [4]
Round 2 and all even rounds to Round 24: sc in each st around.
- Round 3: (sc, 2sc in next st) twice. [6]
- Round 5: (2sc, 2sc in next st) twice. [8]
- Round 7: (3sc, 2sc in next st) twice. [10]
- Round 9: (4sc, 2sc in next st) twice. [12]
- Round 11: (5sc, 2sc in next st) twice. [14]
- Round 13: (6sc, 2sc in next st) twice. [16]
- Round 15: (7sc, 2sc in next st) twice. [18]
- Round 17: (8sc, 2sc in next st) twice. [20]
- Round 19: (9sc, 2sc in next st) twice. [22]
- Round 21: (10sc, 2sc in next st) twice. [24]
- Round 23: (11sc, 2sc in next st) twice. [26]
- Round 25: (12sc, 2sc in next st) twice. [28]
At this point, begin working increases on every round.
- Round 26: (13sc, 2sc in next st) twice. [30]
- Round 27: (14sc, 2sc in next st) twice. [32]
- Round 28: (15sc, 2sc in next st) twice. [34]
- Round 29: (16sc, 2sc in next st) twice. [36]
- Round 30: (17sc, 2sc in next st) twice. [38]
- Round 31: (18sc, 2sc in next st) twice. [40]
- Round 32: (19sc, 2sc in next st) twice. [42]
- Round 33: (20sc, 2sc in next st) twice. [44]
- Round 34: (21sc, 2sc in next st) twice. [46]
- Round 35: (22sc, 2sc in next st) twice. [48]
- Round 36: (23sc, 2sc in next st) twice. [50]
- Round 37: (24sc, 2sc in next st) twice. [52]
- Round 38: (25sc, 2sc in next st) twice. [54]
Fasten off.
- Round 39: Join CC1 in blo of next st, ch1, sc in blo in each st around, slst in first st to join, turn.
- Round 40: ch1, (sc, bob) 27 times, slst in first st to join, turn.
- Round 41: ch1, sc in each st around, slst in first st to join.
Fasten off. Weave in ends.
Bobble
Using CC1, make an MR and work in continuous spirals.
- Round 1: 6sc in MR. [6]
- Round 2: 2sc in each st around. [12]
- Round 3: (sc in next st, 2sc in next st) 6 times. [18]
- Rounds 4-5: sc in each st around.
- Round 6: (sc, sc2tog) 6 times. [12]
- Round 7: 6 sc2tog. [6]
Stuff lightly. Fasten off, leaving a long tail. Weave tail through tops of remaining 6 sts, pull tightly to close and secure end, leaving a tail. With tail, sew to top of Hat. Sew Hat onto Head, pulling down to touch Scarf on back and Nose on front.
Stars
Make 2 each in CC3 and CC2
Make a MR.
Round 1: 5sc in MR. [5]
Round 2: 2sc in each st around. [10]
Round 3: (ch4, starting in 2nd ch from hook, 1slst, 1sc, 1hdc, miss 1 st on Round 2, 1 slst) 5 times. [5 points]
Fasten off, leaving a long tail for sewing.
Sew 1 CC3 Star on side of Body and 1 CC3 Star on diagonal opposite side on the hat.
Glasses
Sew 2 CC2 Stars together through 1 point of each Star to create Glasses. Sew Glasses over Nose around centres, leaving remaining 8 star points loose.
Weave in any remaining ends.
Pattern help
There is a lot more detail in the premium pdf pattern of the crochet gnome, including photos, stitch tutorials, and schematic. Plus it’s yours to print out and keep!
Also please do check out the stitch tutorials on my YouTube channel for extra guidance.
If you are struggling with the pattern, please don’t hesitate to reach out.
Find me on Facebook or Instagram @concretegemscrochet or drop me a message.
Crochet Christmas Gnome Pattern FAQs
Yes, it’s an easy pattern that uses only basic single crochet stitches worked in the round, amigurumi style. The gnome is made from several small pieces that are joined on, so you’ll need to be comfortable with a little sewing up at the end.
It takes approximately 8-12 hours to make, depending on how quickly you crochet. Because he’s worked in small pieces, it’s easy to split the make over several evenings.
The finished gnome is 17 cm wide and 32 cm tall to the top of the hat, when made with cotton DK yarn and a 3mm hook.
I used Cygnet 100% Cotton DK, but any cotton DK yarn will work. A different brand or tension may change the finished size slightly.
Yes, you can sell finished gnomes on a small scale, such as at craft stalls. Please credit Concrete Gems Crochet as the designer, and don’t share or resell the pattern itself.
If you enjoyed making your crochet Christmas gnome pattern, please consider sharing it to social media tagging @concretegemscrochet or come and join the Concrete Gems Crochet Community to share in the joy of crochet with me.
Other Crochet Patterns you Might Enjoy
If you liked this crochet gnome, then you might also enjoy these crochet Christmas patterns:
- Quick crochet garland pattern with trees and snowflakes
- Mosaic crochet headband pattern with snowflakes
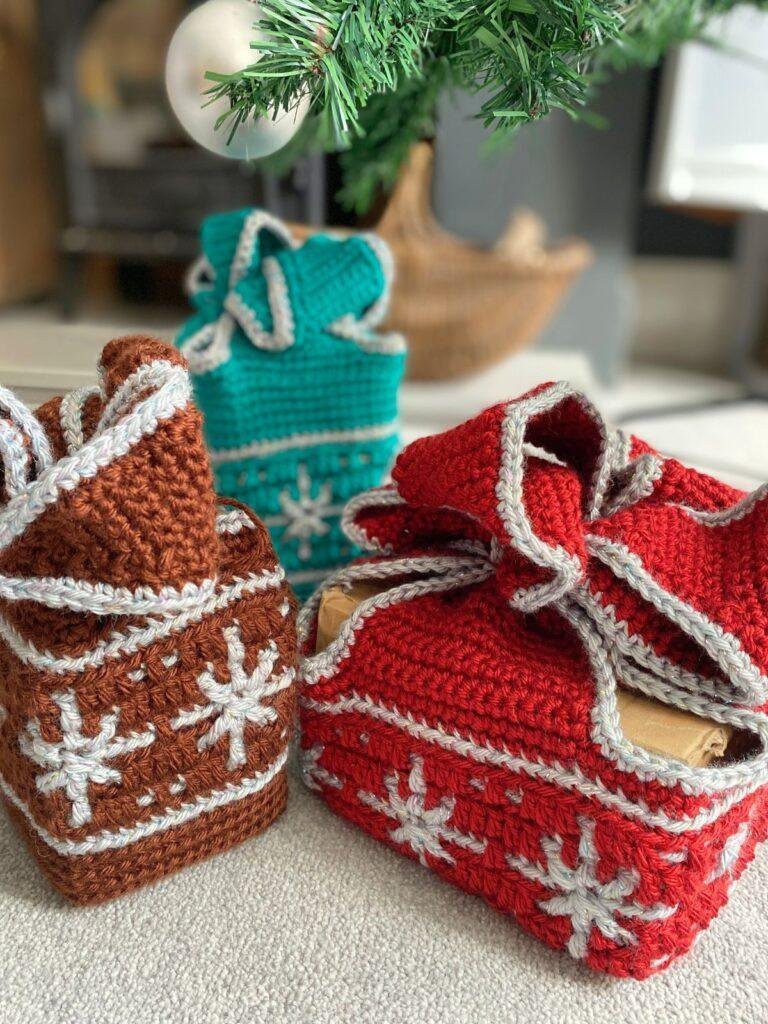
- Christmas crochet book sleeve using mosaic crochet
- Crochet advent calendar pattern with a woodland theme
Thanks for reading and happy crocheting! 🧶