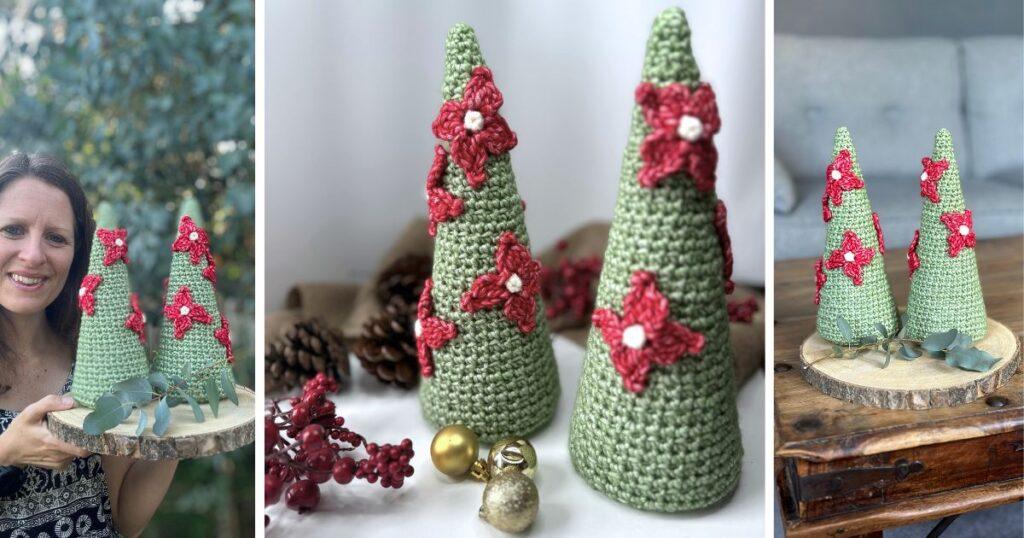
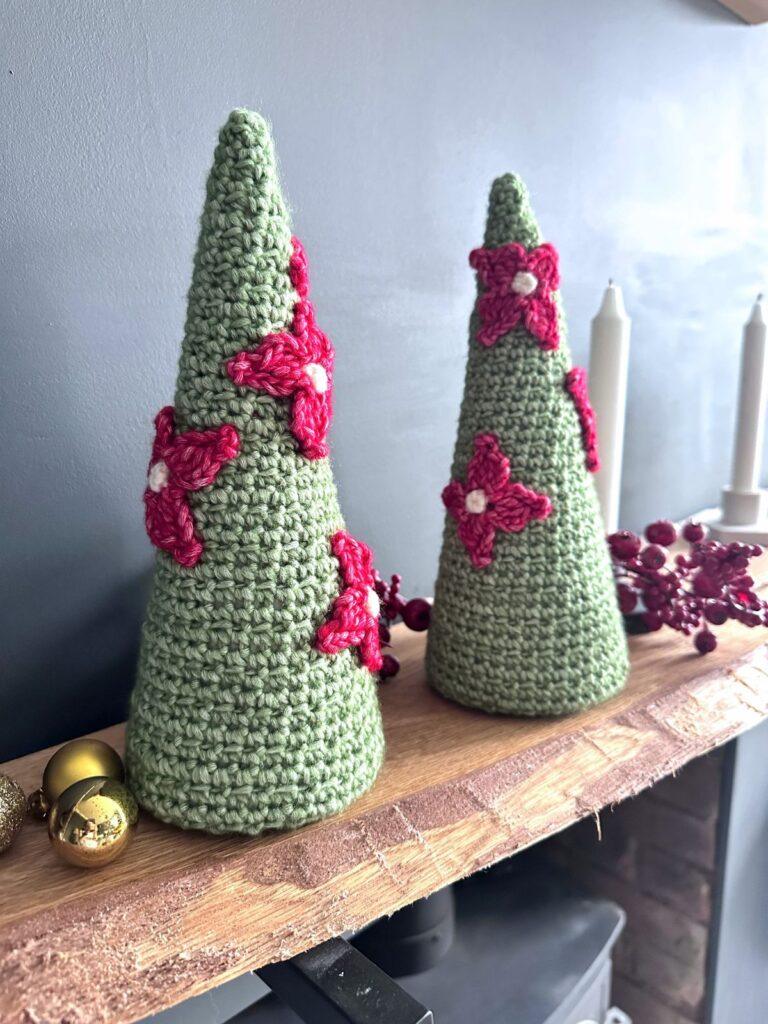
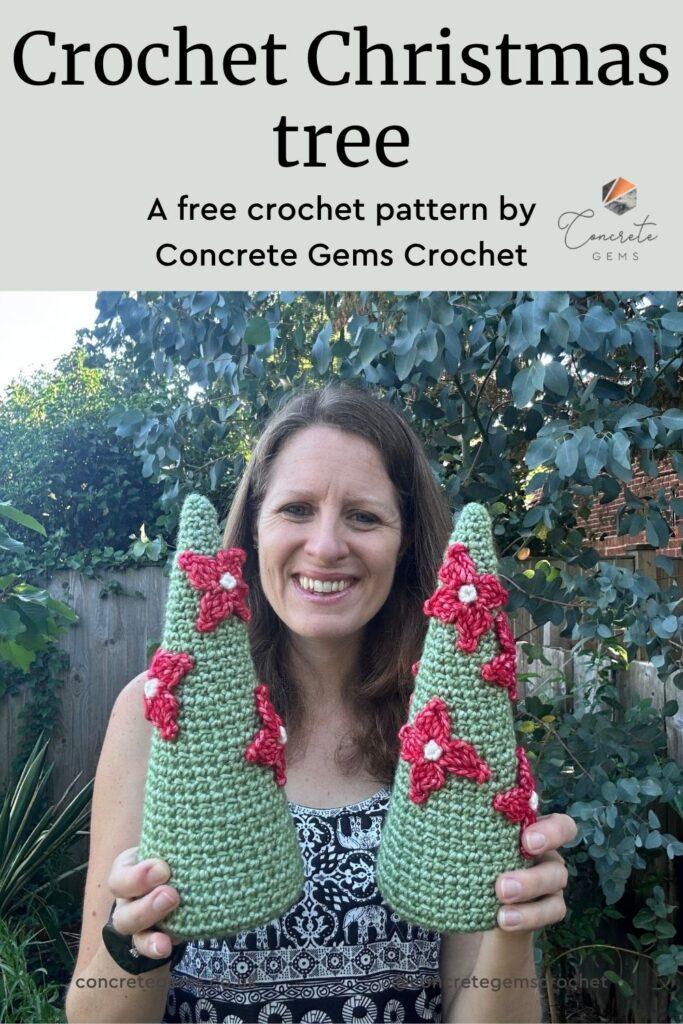
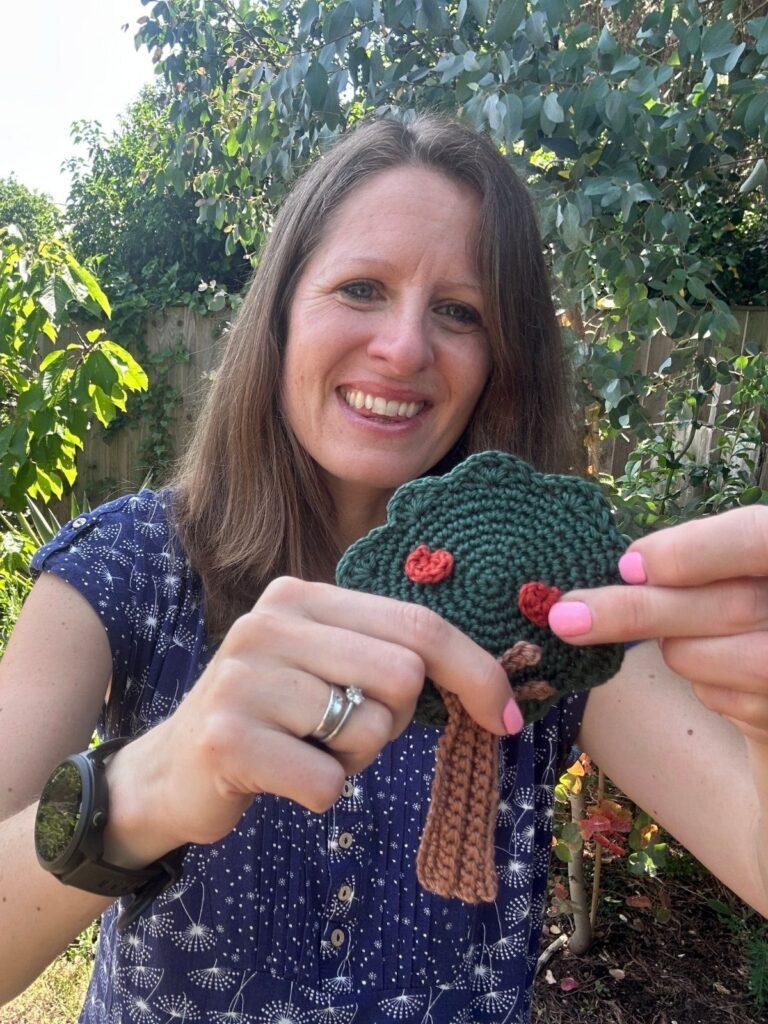
This free crochet Christmas tree pattern is a modern take on festive crochet, featuring a textured cone-shaped tree and bold poinsettia flowers! The combination of sleek lines and delicate florals create an eye-catching decoration that’s perfect for your home or for gifting.
In this post, you’ll find everything you need to make your own crochet trees including full written pattern, yarn options and stitch guidance. There’s also a video tutorial to help you with any tricky bits! Let’s create some contemporary, yet cosy handmade Christmas decorations.
Disclosure: This post may contain affiliate links. This means we may receive a commission if you click a link and make a purchase. However, this does not influence our product recommendations, which are based on honest reviews and genuine enthusiasm. Read my Privacy Policy for more information.
Crochet Christmas Tree Pattern Overview
- Pattern type: Free crochet Christmas tree pattern with beautiful crochet poinsettia flowers adorning it
- Skill level: Easy – just the basic stitches needed
- Stitches: single crochet in different loops, plus a few special stitches for the petals
- Size: Each tree fits a cone 9.5 x 3.5 inches (24 x 9cm)
- Yarn: Yarnsmiths Pebble Haze Aran
- Hook size: 4.5mm
- US terms: or upgrade for UK terms too!
- Perfect for: decorating your home with modern, nordic Christmas decor, or gifting to loved ones.
Yarn Alternatives
This pattern is designed to be used with aran/worsted weight yarn, but you can use any fibre you like. This is a great opportunity to use yarn from your stash.
Here are a few alternative options:
- Brava Worsted, 100% acrylic (218yds/200m, 100g/3.5oz)
- Paintbox Cotton Aran, 100% cotton (93yds/85m, 50g/1.76oz)
- Hayfield Bonus Aran, 100% acrylic (280yds/256m, 100g/3.5oz)
Supplies you will need
- 4.5mm Crochet Hook or hook needed to match gauge
- A tapestry needle for working in ends
- Scissors
- Stitch markers
- Polystyrene cone for each tree 9.5 x 3.5 inches (24 x 9cm)
Size
Each tree fits a cone 9.5 x 3.5 inches (24 x 9cm)
Why you’ll Love this Free Crochet Christmas Tree Pattern
I hope you’re going to love this crochet Christmas tree as much as I do.
- Modern take on classic Christmas crochet
- Quick 4-hour make: perfect for festive gifts
- Striking floral detail with simple stitches
- Ideal handmade gift
- Beginner-friendly with a stunning result
- Display as a Christmas ornament, table centrepiece, or shelf decoration
How to get the pattern
There are a few different ways that you can get your simple crochet Christmas tree pattern.
You can carry on scrolling down and read the pattern for free on the blog in US crochet terms. The blog has ads on it, which is how I am able to offer it for free. Please do bookmark the page and come back to it as you work on your pattern though, rather than trying to print it out. Spending time on this page is how I get paid.
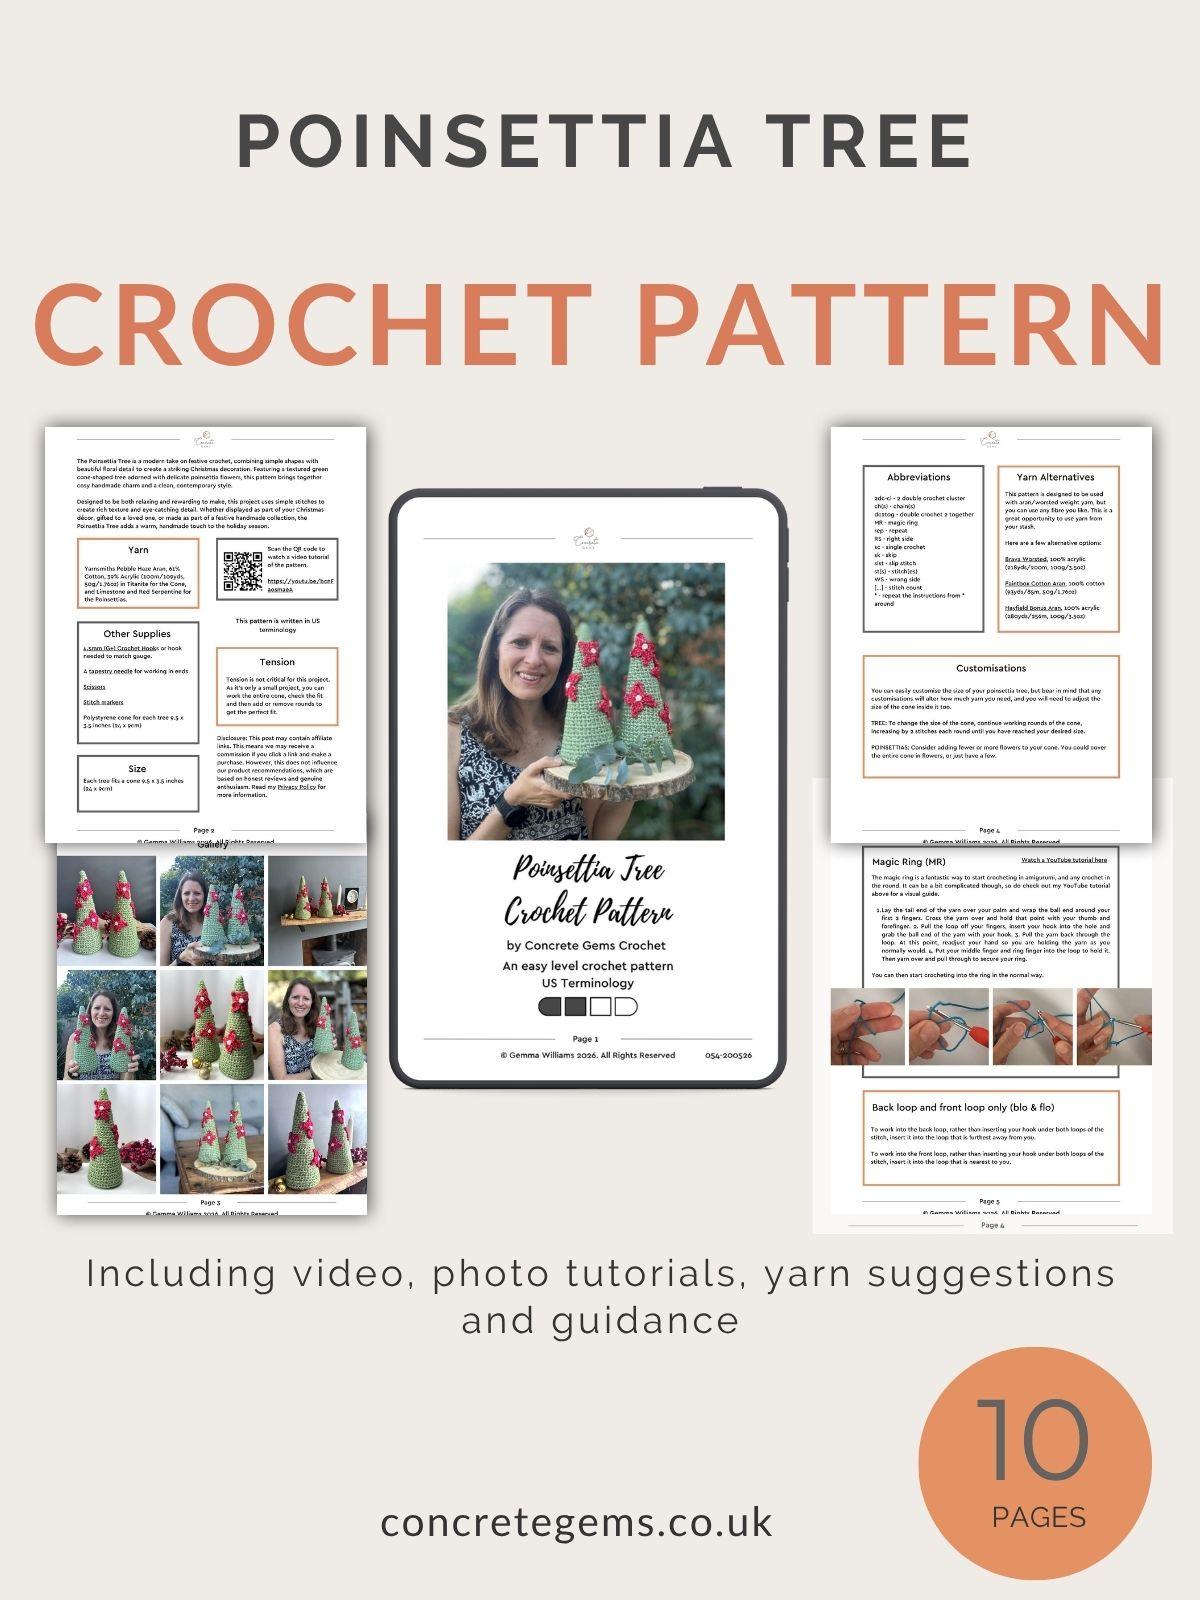
Alternatively you can purchase a premium pdf version of the pattern, which includes schematic, stitch tutorials, links to lots of video tutorials and full explanations. The premium pattern comes in US and UK terms. And of course, if you purchase the pattern, it is yours to keep, print and make notes on too.
PLEASE NOTE: The premium pattern is a pdf crochet pattern, written in English. It is not a finished project. You will receive a digital download upon completion of purchase.
Tension
Tension is not critical for this project. As it’s only a small project, you can work the entire cone, check the fit and then add or remove rounds to get the perfect fit.
Christmas in July Blog Hop
I’m excited to be taking part in the Christmas in July blog hop 2026 hosted by The Crochet Village. It’s full of beautiful crochet patterns from amazing designers, and is the perfect way to get ready for the holiday season ahead. Click on the image below to find each day’s pattern.
Video Tutorial for the Free Crochet Christmas Tree Pattern
If you prefer crocheting from a video tutorial, watch as I show you how to crochet the Poinsettia Tree:
Stitch Abbreviations
- 2dc-cl – 2 double crochet cluster
- blo – back loop only
- ch(s) – chain(s)
- dc2tog – double crochet 2 together
- flo – front loop only
- MR – magic ring
- rep – repeat
- RS – right side
- sc – single crochet (how to do a single crochet stitch)
- sk – skip
- slst – slip stitch
- st(s) – stitch(es)
- WS – wrong side
- […] – stitch count
- * – repeat the instructions from * around
If you love this stitch pattern, you might also like the poinsettia crochet stocking pattern.
What Special Crochet Stitches are Used to Make this Easy Crochet Christmas Tree?
Magic Ring (MR)
The magic ring is a fantastic way to start crocheting in amigurumi, and any crochet in the round. It can be a bit complicated though, so do check out my magic ring YouTube tutorial for a visual guide.
- Lay the tail end of the yarn over your palm and wrap the ball end around your first 2 fingers. Cross the yarn over and hold that point with your thumb and forefinger.
- Pull the loop off your fingers, insert your hook into the hole and grab the ball end of the yarn with your hook.
- Pull the yarn back through the loop. At this point, readjust your hand so you are holding the yarn as you normally would.
- Put your middle finger and ring finger into the loop to hold it. Then yarn over and pull through to secure your ring.
You can then start crocheting into the ring in the normal way.
Back loop and front loop only (blo & flo)
To work into the back loop, rather than inserting your hook under both loops of the stitch, insert it into the loop that is furthest away from you.
To work into the front loop, rather than inserting your hook under both loops of the stitch, insert it into the loop that is nearest to you.
Customising your Crochet Christmas Tree to your Liking
You can easily customise the size of your poinsettia tree, but bear in mind that any customisations will alter how much yarn you need, and you will need to adjust the size of the cone inside it too.
TREE: To change the size of the cone, continue working rounds of the cone, increasing by 2 stitches each round until you have reached your desired size.
POINSETTIAS: Consider adding fewer or more flowers to your cone. You could cover the entire cone in flowers, or just have a few.

Pattern Notes
Be sure to read through these notes before you start your easy crochet Christmas tree – they will make it so much easier to understand the pattern!
- Read through the pattern completely before starting and refer to the stitch tutorials as needed.
- The tree is worked in continuous spirals, which means we do not join at the end of a round, but continue straight into the next round.
- Use stitch markers to mark the first stitch of each round.
- The tree uses alternating front loop and back loop stitches. When you are working increase stitches you will work one of the stitches in the back loop and one in the front loop of the same stitch.
- Stitch counts are given in [ ] at the end of a round. Where there is no stitch count, it is the same as the previous round.
- The 2dc cluster (2dc-cl) in the petal are worked into one stitch as follows: yarn over, insert hook into stitch, yarn over and pull through a loop, yarn over and pull through 2 loops, yarn over and insert hook into same stitch, yarn over and pull through a loop, yarn over and pull through 2 loops, yarn over and pull through remaining loops to complete the stitch.
Join the Concrete Gems Crochet Community for pattern support!
Free Crochet Christmas Tree Pattern
US Terminology.
Not ready to start yet? Summarise and save this crochet pattern for later:
To unlock the free, exclusive content from Concrete Gems Crochet, all you have to do is enter your email address and create a password in the box below.
Every time you see Grow Exclusive Content from then on, you will be able to log in with your username and password and view the content. This also applies on other blogs, who use Grow.
Thank you for subscribing! I hope you enjoy the free patterns on this site. I can’t wait to see what you create! Please do share your crochet makes tagging @concretegemscrochet
- Round 16: (sc in next 15 sts, 2sc in next st) twice. [34]
- Round 17: (sc in next 16 sts, 2sc in next st) twice. [36]
- Round 18: (sc in next 17 sts, 2sc in next st) twice. [38]
- Round 19: (sc in next 18 sts, 2sc in next st) twice. [40]
- Round 20: (sc in next 19 sts, 2sc in next st) twice. [42]
- Round 21: (sc in next 2o sts, 2sc in next st) twice. [44]
Fasten off leaving a long tail. Insert your cone into the tree and check for size. Adjust as necessary. You will need to remove the cone again to sew on the flowers.
POINSETTIA
Make as many as desired for your tree.
How about trying another Christmas crochet pattern? This mini crochet stocking is perfect for hanging chocolate coins on the Christmas tree.
CENTRE
Using Limestone, make a MR.
Round 1: 4sc in MR, slst in first st to join.
Fasten off.
PETALS
Using Red Serpentine, slst in flo of any st, *(ch3, 2dc-cl in flo, ch3, slst in third ch from hook, ch3, slst in flo) in same st as previous slst, sl st in flo of next st, rep from * 3 more times, working last slst in first st.
Fasten off and weave in ends, using one end to sew poinsettias to the tree. You can either sew the centres in place, and add a stay stitch on each petal to hold them in place, or use pins to hold the petals in place once the cone is in place.
Once all flowers are secure, insert tree into cone. Using your long tail, weave in and out of the last round of sts. Pull tight to secure the tree to the cone and weave in the ends.
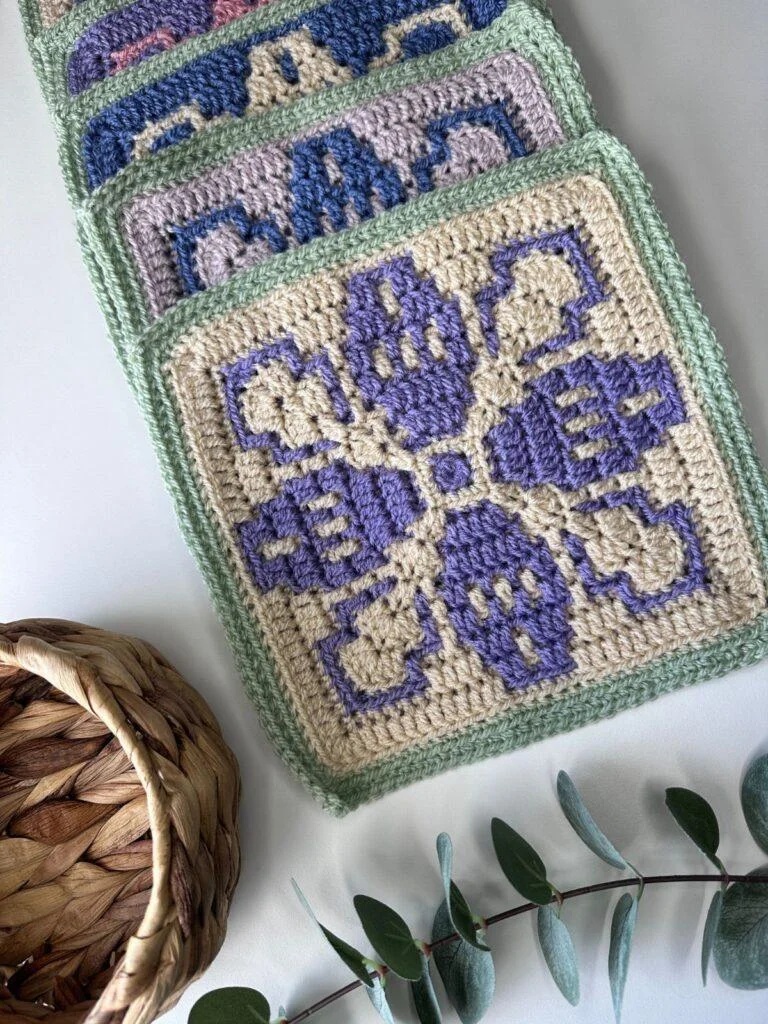
Check out my other crochet patterns too for more crochet inspiration. You might like the trailing leaves crochet blanket pattern.
Pattern help
There is a lot more detail in the premium pdf pattern of the crochet Christmas tree pattern, including photos, stitch tutorials and a schematic. Plus it’s your to print out and keep!
Also please do check out the stitch tutorials on my YouTube channel for extra guidance.
Get the ad-free PDF here!
Upgrade to the premium PDF and create the Poinsettia Tree — a beautifully textured green cone-shaped tree adorned with delicate poinsettia flower.
What You Get
✨ Ad-free, printable PDF in UK and US terms — instant download
🌸 Stitch tutorials, yarn options, and customisation
🎥 Supporting video tutorials to guide you along the way
💛 A relaxing project you can pick up and enjoy anytime
If you are struggling with the pattern, please don’t hesitate to reach out.
Find me on Facebook or Instagram @concretegemscrochet or drop me a message.
FAQs
A: This crochet pattern is suitable for confident beginners and beyond. If you’re comfortable with basic stitches and following a pattern, you’ll be able to master this make with the help of the written instructions and video tutorials included.
A: Each tree is designed to fit a polystyrene cone measuring 9.5 x 3.5 inches (24 x 9cm). You can size up or down by adding or removing increase rounds, just remember this will change how much yarn you need.
A: Yes — this pattern is written for aran/worsted weight yarn, but you can use any fibre or weight you like, just be aware your finished tree will be a different size and you’ll need to adjust your cone to match.
A: That’s completely up to you! Add just a few scattered around the polystyrene cone Christmas decoration for a subtle look, or cover the entire tree for a fuller, more dramatic finish.
A: No, the tree is worked in continuous spirals, so you don’t join — just use a stitch marker to keep track of where each round begins.
If you enjoyed making your simple crochet Christmas tree pattern, please consider sharing it to social media tagging @concretegemscrochet or come and join the Concrete Gems Crochet Community to share in the joy of crochet with me.
Other Crochet Patterns you Might Enjoy
If you enjoyed making this easy crochet Christmas tree, then you might also like these crochet Christmas patterns:
- Mini crochet Stocking ornament – to hang on a tiny tree or advent calendar.
- Nordic crochet Christmas tree skirt – with cute trees and huts.
- Crochet advent calendar – with a woodland theme.
Thanks for reading and happy crocheting! 🧶
The pattern is lovely. The free download button brings me to a page that thanks me for getting the pattern … but no pattern to download.
I’m so sorry about that. I’ve just emailed over the pattern to you.