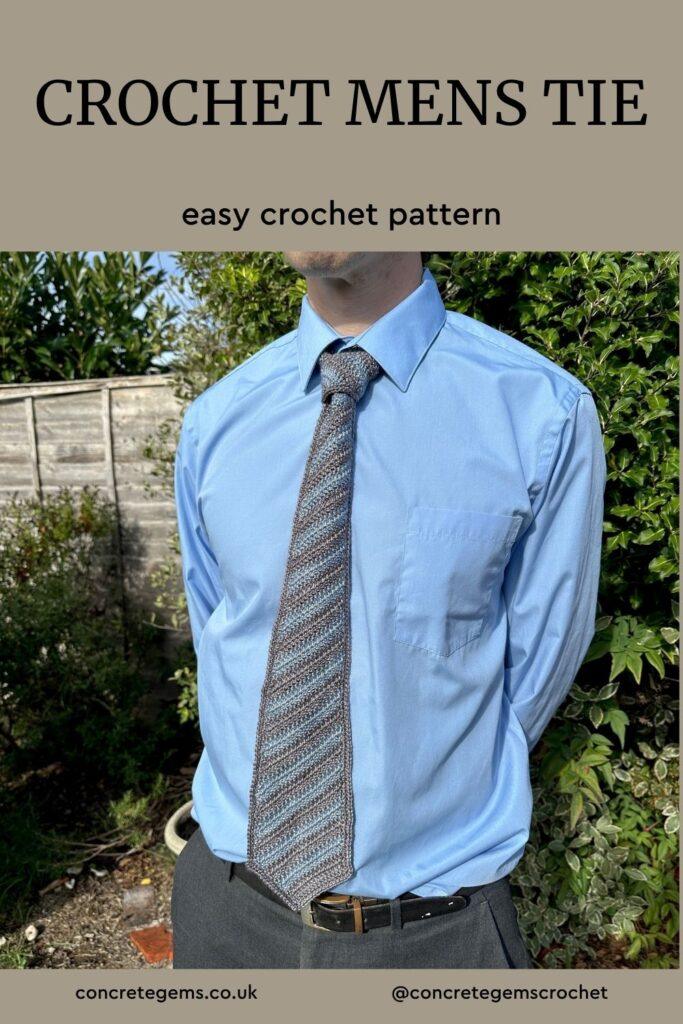
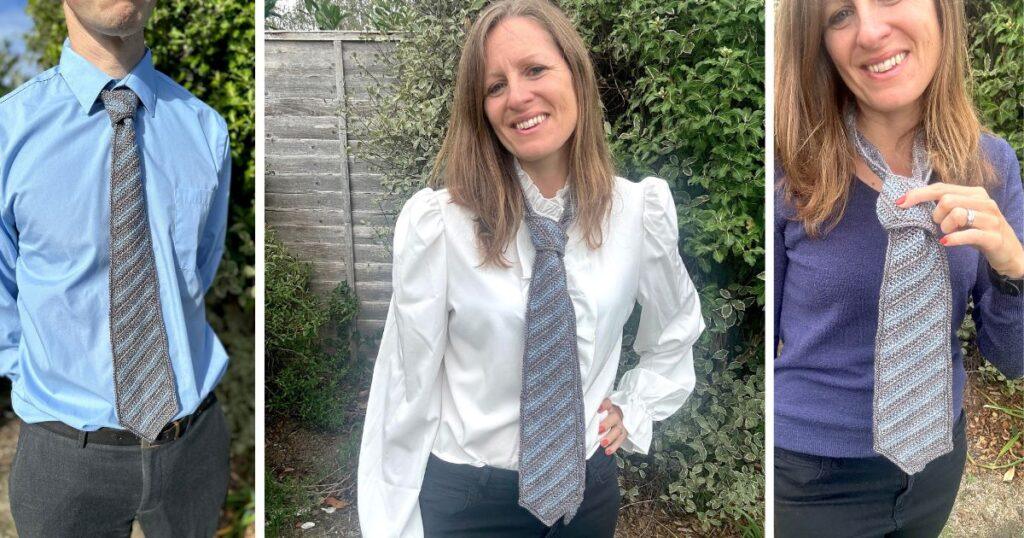
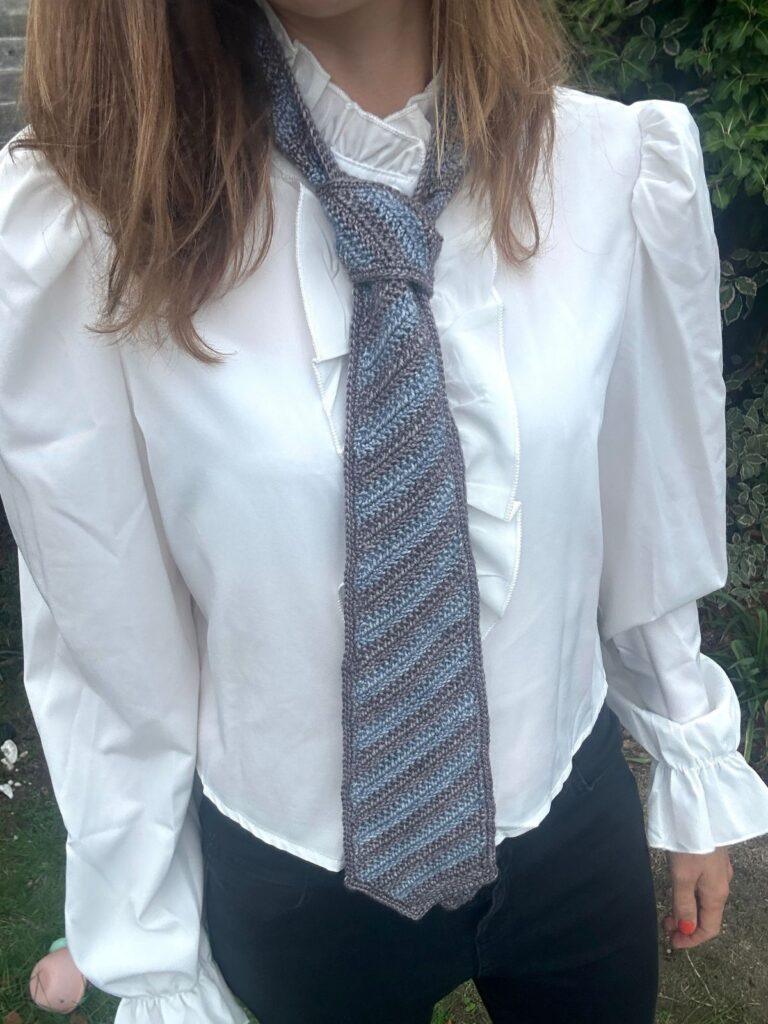
I’d like to introduce this free crochet men’s tie pattern! It’s a textured, woven-look tie, worked in fingering weight yarn with a 3mm hook, using the herringbone double crochet stitch. It measure 60 inches (152 cm) long and 4 inches (10 cm) at its widest point. It’s an easy-level projects that takes around 10 hours to make, and there’s a video tutorial to help you get started.
I wanted to design a handmade gift for men that looked properly smart. The herringbone double crochet makes a gorgeous fabric with a gentle diagonal texture, which gives this free crochet men’s tie pattern the look of a shop bought woven tie. The written pattern is below and I’ve also linked a separate tutorial for the stitches in case you’d like to practise first.
Disclosure: This post may contain affiliate links. This means we may receive a commission if you click a link and make a purchase. However, this does not influence our product recommendations, which are based on honest reviews and genuine enthusiasm. Read my Privacy Policy for more information.
Quick Look at the Crochet Men’s Tie Free Pattern
- Skill level: Easy – once you get the hang of the herringbone double crochet stitch, you’ll be well away
- Crochet Stitches: Foundation double crochet, herringbone double crochet, and single crochet
- Sizes: 60 inches x 4 inches (152cm x 10cm)
- Yarn: Fingering weight
- Hook size: 3mm
- Approx. make time: 10 hours
- US terms: or upgrade for UK terms too!
- Perfect for: gifts for Dad, partner, groom or friend. A great way to learn herringbone double crochet.
*This helps Google recognise me as a crochet designer 😊
Why you’ll Love this Crochet Men’s Tie Pattern
- It looks like a woven tie – the herringbone double crochet creates a slanting effect, making the finished tie smart enough to wear with a shirt.
- Only a handful of stitches – foundation double crochet and herringbone double crochet are the only stitches you’ll need to learn and each has a short video to help.
- Easy to follow – with a video showing you how to get started too!
- A thoughtful handmade gift – choose your colours to suit the person you’re making it for.
If you love stylish accessories, you should also check out this modern crochet shawl pattern.
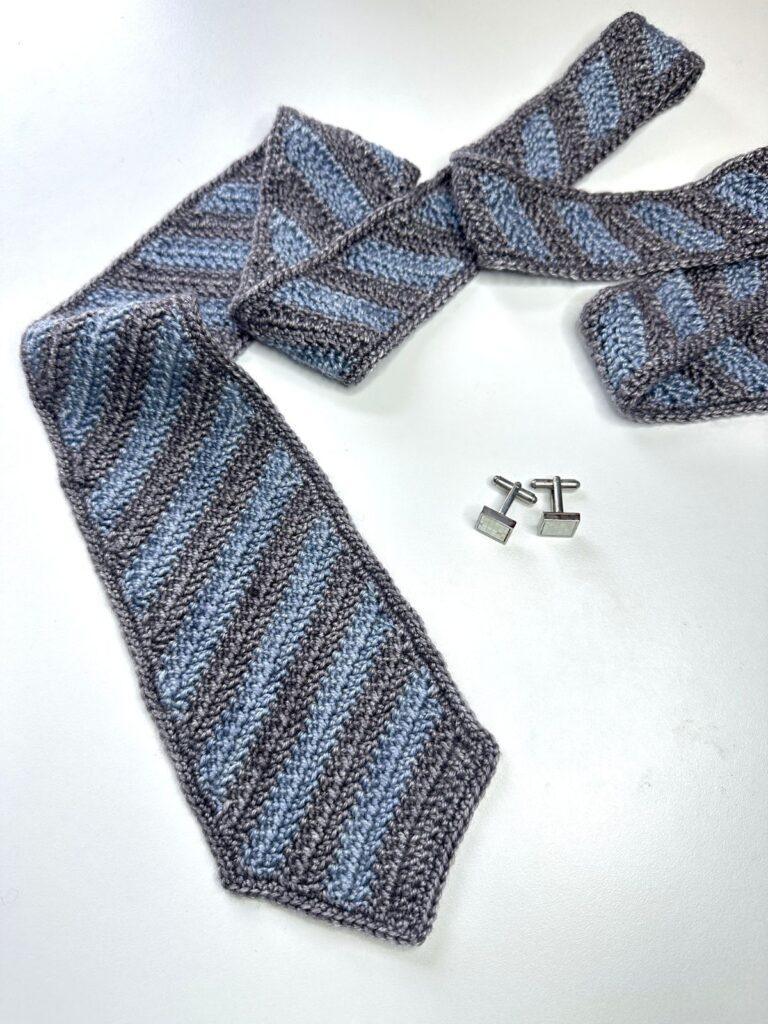
How is this Crochet Tie Made?
We start at the widest end and work back and forth in rows, increasing and decreasing to create the classic tie shape, changing colour every 2 rows as we go.
Once the length of the tie is achieved, we then work a couple of rounds of edging to finish the tie.
Yarn
Any fingering weight yarn in 2 colours. You will need approx. 155 yds of each colour for the tie.
Yarn Suggestions
This pattern is designed to be used with Fingering weight yarn, but you can substitute for any that you prefer. I used some yarn I found in my stash and I absolutely recommend you do the same!
Here are a few options:
- Gloss Fingering, 70% Merino Wool, 30% Silk (50g/1.76oz, 201m/220yds)
- Cascade Yarns 220 Superwash Fingering, 100% Merino Wool, 50g/1.76oz, 200m/219yds)
- Premier Everyday Super Fine Yarn, 100% anti-pilling acrylic, (100g/3.5oz, 400m/437yds)
Materials For Your Crochet Men’s Tie
- 3mm (US C/D) Crochet Hook or hook needed to match gauge
- A tapestry needle for working in ends
- Scissors
- Stitch markers
Size
The tie measures 60 inches (152cm) in length and is 4 inches (10cm) wide at the widest point.

Get the ad-free PDF here!
Upgrade to the premium PDF or carry on scrolling down and read the tie pattern for free on the blog in US crochet terms.
What You Get
✨ Ad-free, printable PDF in UK and US terms — instant download
🌸 Stitch tutorials, schematic, yarn options, and customisation
🎥 Supporting video tutorial to guide you along the way
💛 A relaxing project you can pick up and enjoy anytime
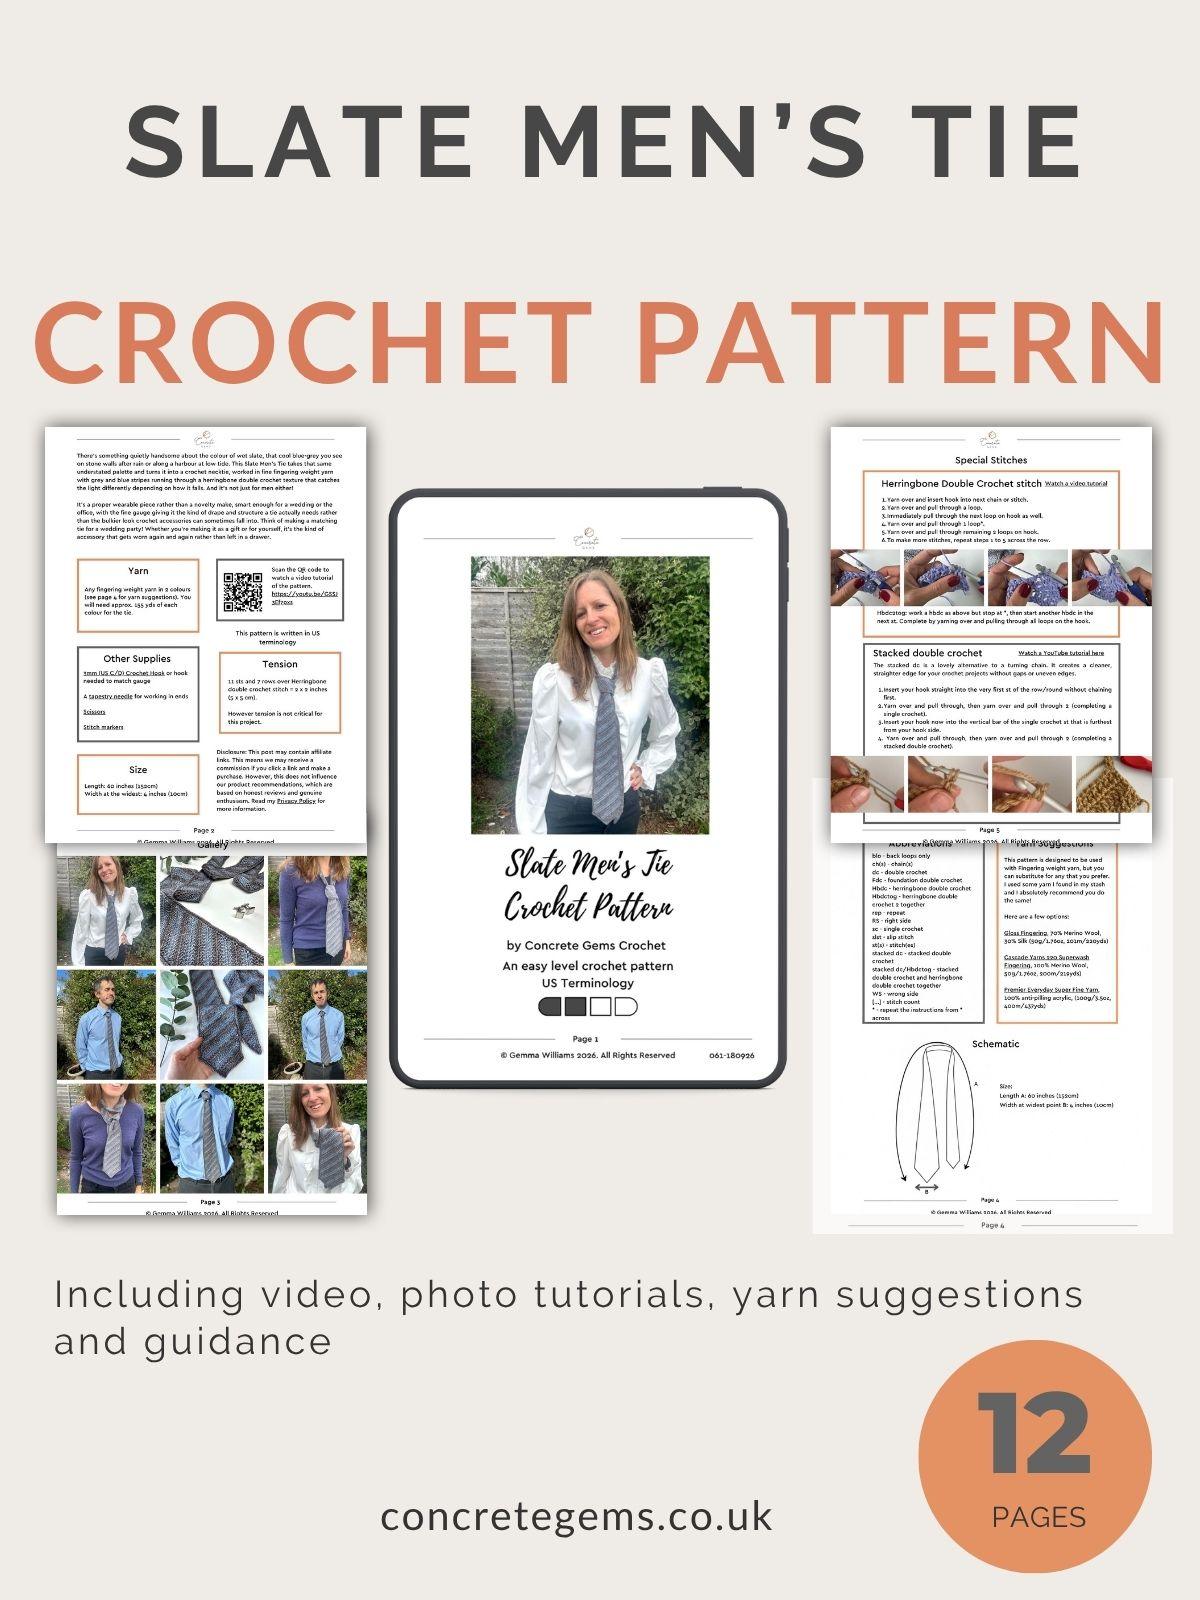
PLEASE NOTE: The premium pattern is a pdf crochet pattern, written in English. It is not a finished project. You will receive a digital download upon completion of purchase. The blogpost contains ads which is how I am able to offer it for free.
Tension
11 sts and 7 rows over Herringbone double crochet stitch = 2 x 2 inches (5 x 5 cm).
If your sample square is bigger than the tension given, try with a smaller hook size. If your square is smaller, try with a larger hook.
Video Tutorial for the Crochet Men’s Tie Free Pattern
If you prefer crocheting from a video tutorial, watch along as I show you how to crochet the acorn here:
Stitch Abbreviations
- blo – back loops only
- ch(s) – chain(s)
- dc – double crochet
- Fdc – foundation double crochet
- Hbdc – herringbone double crochet
- Hbdctog – herringbone double crochet 2 together
- rep – repeat
- RS – right side
- sc – single crochet (how to do a single crochet stitch)
- slst – slip stitch
- st(s) – stitch(es)
- stacked dc – stacked double crochet
- stacked dc/Hbdctog – stacked double crochet and herringbone double crochet together
- WS – wrong side
- […] – stitch count
- * – repeat the instructions from *
- across
If you love this pattern, take a look at my vintage crochet mosaic handbag pattern.
What Special Crochet Stitches are Used to Make this Easy Crochet Tie?
Herringbone Double Crochet Stitch
- Yarn over and insert hook into next chain or stitch.
- Yarn over and pull through a loop.
- Immediately pull through the next loop on hook as well.
- Yarn over and pull through 1 loop*.
- Yarn over and pull through remaining 2 loops on hook.
- To make more stitches, repeat steps 1 to 5 across the row.
Watch a video tutorial of the herringbone double crochet stitch.
Stacked Double Crochet
The stacked dc is a lovely alternative to a turning chain. It creates a cleaner, straighter edge for your crochet projects without gaps or uneven edges.
- Insert your hook straight into the very first st of the row/round without chaining first.
- Yarn over and pull through, then yarn over and pull through 2 (completing a single crochet).
- Insert your hook now into the vertical bar of the single crochet st that is furthest from your hook side.
- Yarn over and pull through, then yarn over and pull through 2 (completing a stacked double crochet).
Watch how to make the stacked double crochet.
Stacked double crochet and herringbone double crochet together
This st is used at the start of a row in this pattern.
- After turning your work, make a single crochet in the first st.
- Insert your hook into the vertical bar of the single crochet st that is furthest from your hook side (as above), yarn over and pull through a loop.
- Next yarn over and insert your hook into the next st, yarn over and pull through a loop.
- Immediately pull through the next loop on hook as well.
- Yarn over and pull through 1 loop.
- Yarn over and pull through remaining 3 loops on hook.
Foundation Double Crochet
A foundation dc allows you to create that first row of your project without using a chain.
- Start with a slipknot and ch3 (this does not count as a stitch).
- Yarn over and insert hook in third ch from hook and pull through a loop.
- Yarn over and pull through one loop (this makes the chain part of your first Foundation dc).
- (Yarn over and pull through 2 loops on your hook) twice – this makes the dc part of your first Foundation dc.
- Yarn over and insert your hook into the chain part of the previous stitch, going through the two top ‘v’ shape strands of the chain.
- Yarn over and pull through one loop (this makes the chain part of the Foundation dc).
- (Yarn over and pull through 2 loops on your hook) twice – this makes the dc part of the Foundation dc.
- Repeat steps 5 to 7 across the row.
You can watch a video of the foundation double crochet here.
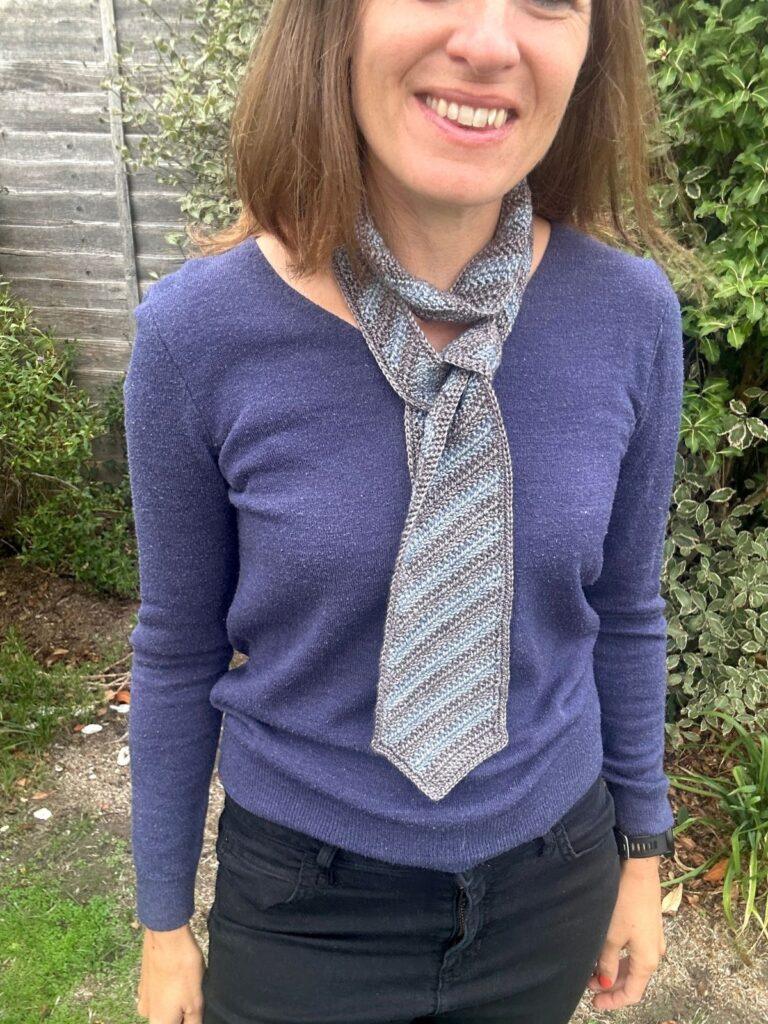
Pattern Notes
Be sure to read through these notes before you start your crochet tie — they’ll make the pattern much easier to follow.
- Read through the pattern completely before starting and refer to the stitch tutorials as needed.
- ch1 does not count as a stitch.
- Stitch counts are given in [ ] at the end of a row. Where there is no st count, it is the same as the previous row.
- At the end of row 8, we stop increasing stitches and create the 3rd point of the tie end. At this point, place a stitch marker, so that you know where to put the edging corner later.
- Change colour every 2 rows to create the striped effect.
Changing Colour at the End of a Row
- Work the final stitch before the colour change until the last yarn over.
- Instead of completing the stitch with the current colour, yarn over with the new colour.
- Pull the new colour through to complete the stitch.
- Continue with the new colour.
- Because the colour switch happens during the final step of the previous stitch, the new stitch appears fully formed in the correct shade.
Join the Concrete Gems Crochet Community for pattern support!
Crochet Men’s Tie – Free Pattern
US Terminology.
Not ready to start yet? Summarise and save this crochet pattern for later:
To unlock the free, exclusive content from Concrete Gems Crochet, all you have to do is enter your email address and create a password in the box below.
Every time you see Grow Exclusive Content from then on, you will be able to log in with your username and password and view the content. This also applies on other blogs, who use Grow.
Thank you for subscribing! I hope you enjoy the free patterns on this site. I can’t wait to see what you create! Please do share your crochet makes tagging @concretegemscrochet
If you’re enjoying this crochet tie pattern, take a look at my crochet scarf pattern for ladies too.
Row 28: stacked dc/Hbdctog over first 2 sts, Hbdc in each st to last st, 2Hbdc in last st, turn.
Rows 29-32: rep Rows 19-20 twice.
Row 33: stacked dc in first st, Hbdc in next 13 sts, Hbdc2tog over next 2 sts, skip last st, turn . [15]
Row 34: stacked dc/Hbdctog over first 2 sts, Hbdc in each st to last st, 2Hbdc in last st, turn.
Rows 35-46: rep Rows 19-20 six times.
Row 47: stacked dc in first st, Hbdc in next 11 sts, Hbdc2tog over next 2 sts, skip last st, turn . [13]
Row 48: stacked dc/Hbdctog over first 2 sts, Hbdc in each st to last st, 2Hbdc in last st, turn.
Rows 49-54: rep Rows 19-20 three times.
Rows 55-71
Row 55: stacked dc in first st, Hbdc in next 9 sts, Hbdc2tog over next 2 sts, skip last st, turn. [11]
Row 56: stacked dc/Hbdctog over first 2 sts, Hbdc in each st to last st, 2Hbdc in last st, turn.
Rows 57-62: rep Rows 19-20 three times.
Row 63: stacked dc in first st, Hbdc in next 7 sts, Hbdc2tog over next 2 sts, skip last st, turn . [9]
Row 64: stacked dc/Hbdctog over first 2 sts, Hbdc in each st to last st, 2Hbdc in last st, turn.
Rows 65-70: rep Rows 19-20 three times.
Row 71: stacked dc in first st, Hbdc in next 5 sts, Hbdc2tog over next 2 sts, skip last st, turn . [7]
Rows 72-166
Row 72: stacked dc/Hbdctog over first 2 sts, Hbdc in each st to last st, 2Hbdc in last st, turn.
Rows 73-160: rep Rows 19-20 forty-four times.
Row 161: stacked dc in first st, Hbdc in next st, Hbdc in each st to last 2 sts, Hbdc2tog over last 2 sts, turn. [6]
Row 162: stacked dc/Hbdctog over first 2 sts, Hbdc in next 4 sts, turn. [5]
Row 163: stacked dc in first st, Hbdc in next 2 sts, Hbdc2tog over last 2 sts, turn. [4]
Row 164: stacked dc/Hbdctog over first 2 sts, Hbdc in next 2 sts, turn. [3]
Row 165: stacked dc in first st, Hbdc2tog over last 2 sts, turn. [2]
Row 166: stacked dc/Hbdctog over first 2 sts. [1]
Fasten off.
Edging
Join yarn (I used the grey) in any stitch. We are going to be working into the row ends around the entire edge of the tie.
Round 1: ch1, 2sc in each row end around, making (sc, ch2, sc) in each tie point (this is the start and end of row 1, the end of row 8 for the opposite point, and the top of row 166), slst in first st to join.
Round 2: ch1, sc in each st around, making (sc, ch1, sc) in each ch2 space, slst in first st to join.
Fasten off and weave in all ends.
Block to shape.
Check out my other crochet patterns for more crochet inspiration. You might like this crochet hexagon cardigan pattern.
Pattern help
There is a lot more detail in the premium pdf pattern of the crochet men’s tie, including photos, stitch tutorials, and schematic. It’s also yours to print out and keep!
Also please do check out the stitch tutorials on my YouTube channel for extra guidance.
If you are struggling with the pattern, please don’t hesitate to reach out. Find me on Facebook or Instagram @concretegemscrochet or drop me a message.
FAQs About This Easy Crochet Men’s Tie Pattern
A: Any fingering weight yarn works for this pattern, as long as your tension matches. A smooth, round yarn will show off the herringbone texture best, and choosing a washable fibre makes the tie easier to look after.
A: You will need approximately 155 yards of each of the two colours to crochet the tie, but make sure to order plenty.
A: This tie takes around 10 hours to make, so it suits a few quiet evenings or a weekend of crocheting. However, timings vary depending on pace. The herringbone rows take a little longer than plain double crochet, but they build up quickly once you’ve found your rhythm.
A: It’s an easy-level pattern that uses just two stitches, foundation double crochet and herringbone double crochet. There’s a video tutorial for the tie and a separate short tutorial for each stitch, and so you can practise before you begin.
The tie is made with foundation double crochet and herringbone double crochet, written in US terms. In UK terms, these are foundation treble crochet and herringbone treble crochet.
If you enjoyed making your crochet tie, please consider sharing it to social media tagging @concretegemscrochet or come and join the Concrete Gems Crochet Community to share in the joy of crochet with me.
Other Crochet Patterns you Might Enjoy
If you liked this crochet men’s tie, then you might also enjoy these crochet accessories patterns:
- This easy crochet beanie pattern features textured leaves running down it.
- Have a go at Tunisian Crochet entrelac with this crochet temperature shawl pattern.
- These autumnal micro crochet earrings make a great gift.
Thanks for reading and happy crocheting! 🧶