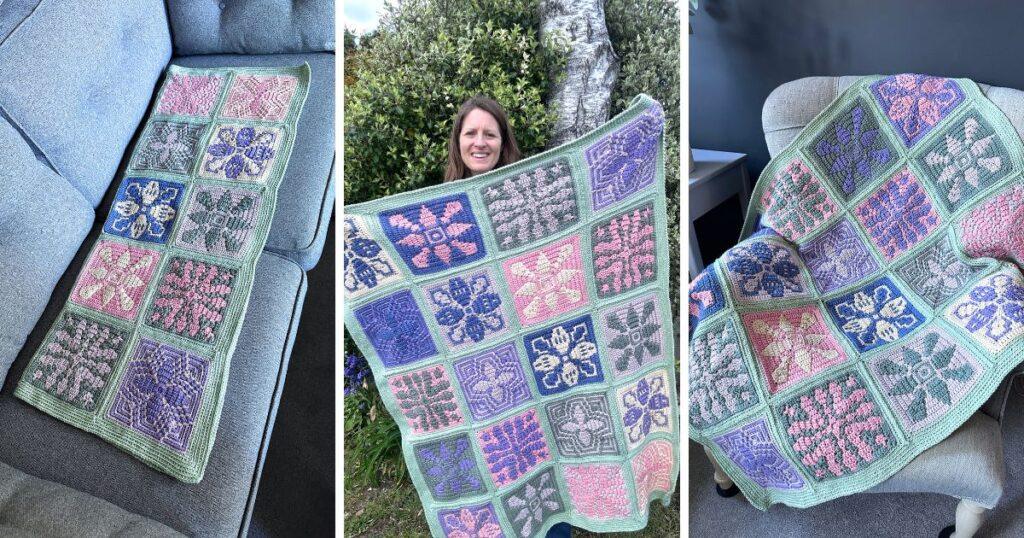
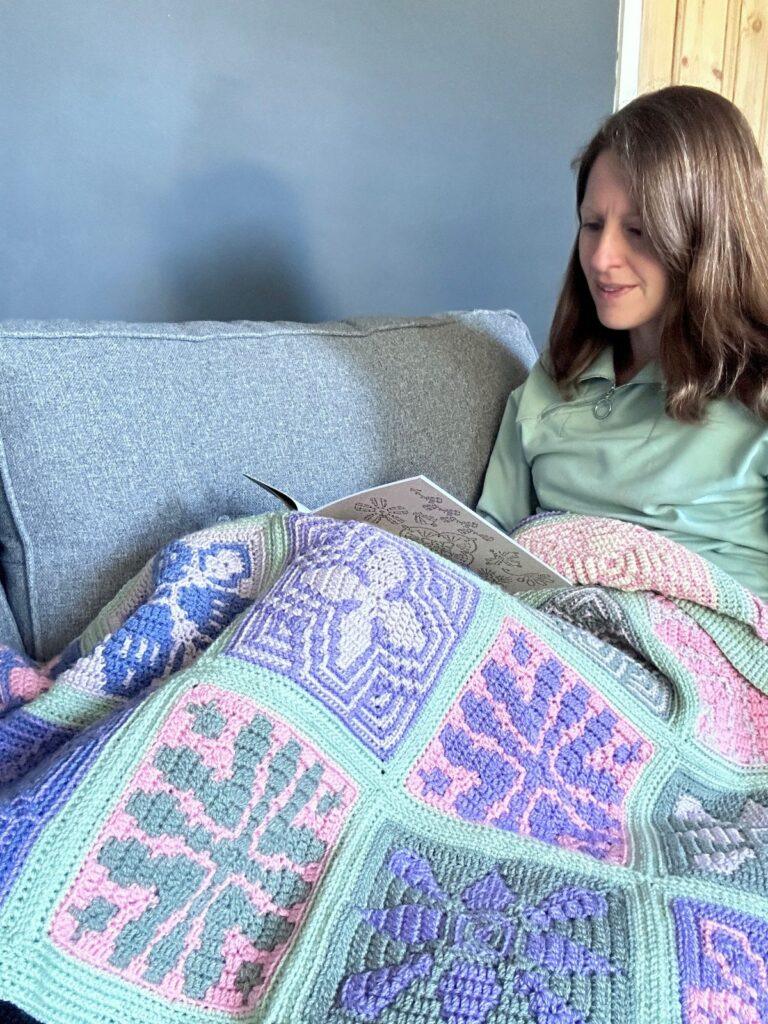
This mosaic crochet blanket pattern brings together a collection of floral squares to create a beautifully textured and calming project. Each square is worked in the round using mosaic crochet techniques, creating intricate detail with simple stitches—and no sewing in ends, as your yarn is carried neatly up the inside.
In this post, you’ll find everything you need to help you join your squares and add the border, transforming your individual pieces into a finished blanket. There’s also a video tutorial to help you with any tricky bits! Whether you’ve followed along with each square or are discovering the pattern as a whole, this is where it all comes together.
Disclosure: This post may contain affiliate links. This means we may receive a commission if you click a link and make a purchase. However, this does not influence our product recommendations, which are based on honest reviews and genuine enthusiasm. Read my Privacy Policy for more information.
Mosaic Crochet Blanket Pattern Overview
- Pattern type: Floral mosaic crochet blanket pattern – made of 4 mosaic crochet squares
- Skill level: Advanced beginner (confident with basic stitches and working in the round)
- Stitches: single crochet and mosaic double crochet stitches in the overlay mosaic crochet technique
- Size: Finished blanket size, including border: 36 x 44.5 inches (91.5 x 113cm)
- Yarn: Paintbox Yarns Simply DK
- Hook size: 4mm
- US terms: or upgrade for UK terms too!
- Perfect for: a spring blanket you can work on on-the-go! Makes a great stash buster too!
These yarn amounts are based on a rectangular 20-square blanket with border using 7 colours in total as given in the pattern.
You will need 800yds, 732m of MC: for borders & joining – Pistachio Green (124). This is 3 balls of the recommended yarn.
For the squares, you will need 300yds, 275m of each of the 6 CC colours: Pine Green (67), Cerulean Blue (74), Blush Pink (153), Dusty Lilac (146), Vanilla Cream (107), Greige Pink (81). This is 1 ball of each.
Yarn Alternatives
This pattern is designed to be used with DK weight yarn, but you can substitute for any that you prefer. Now is the perfect time to use yarn from your stash!
Here are a few alternative options:
- Brava Recycle, 100% Recycled Acrylic, (100g/3.5oz, 280m/306yds)
- Stylecraft Special DK, 100% Acrylic, (100g/3.5oz, 295m/323yds)
- Emu Classic DK, 100% Acrylic, (100g/3.5oz, 282m/308yds)
Supplies you will need
- 4.0mm Crochet Hook or hook needed to match gauge
- A tapestry needle for working in ends
- Scissors
- Stitch markers
Size
Each square measures 8.5 by 8.5 inches (22 x 22cm) including the square’s border. The border adds 0.5 inch (1cm) on each side.
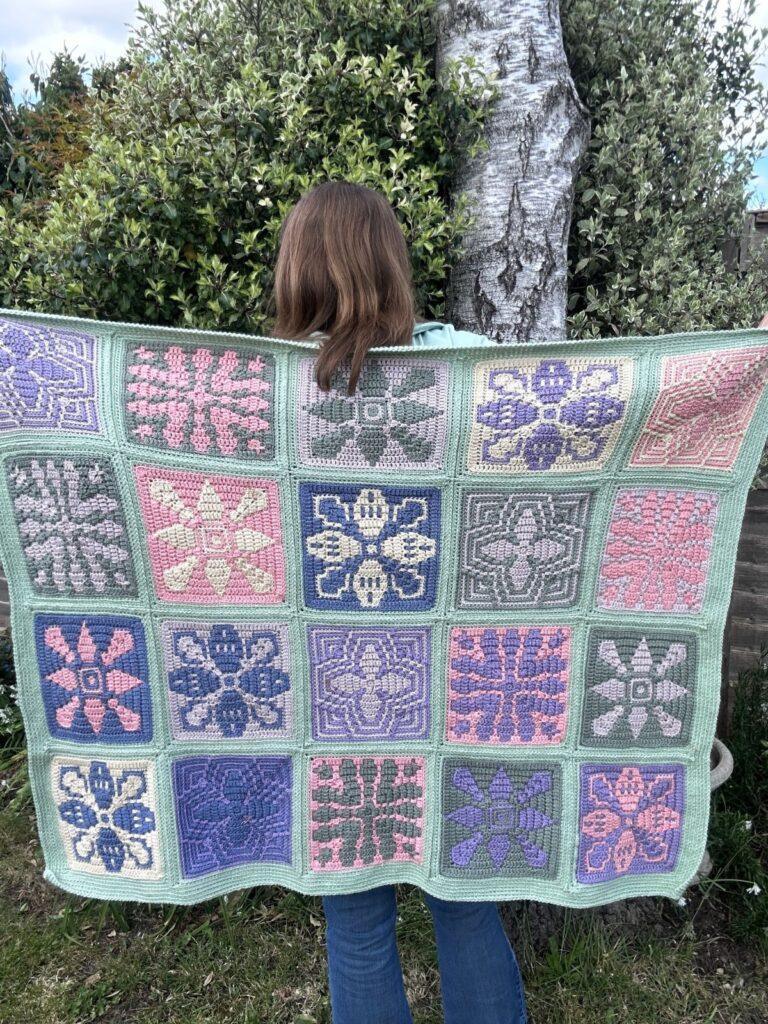
I made 20 squares and joined them to make a rectangle 4 squares wide by 5 squares long.
Finished blanket size, including border: 36 x 44.5 inches (91.5 x 113cm)
The Mosaic Crochet Squares
There are four different crochet squares in this blanket, which you can find on separate blogposts:
- Mosaic crochet square 1
- Mosaic crochet potholder (or square 2)
- Mosaic crochet flower pattern (square 3)
- Mosaic crochet square pattern 4
Once you have made all of the squares you need, come back here to join them and add the border. But before you do that, read on to find out all about the different options available for your blanket.
How to get the pattern
There are a few different ways that you can get your mosaic crochet blanket pattern.
You can carry on scrolling down and read the joining and border pattern for free on the blog in US crochet terms, and find the other squares across the blog. The blog has ads on it, which is how I am able to offer it for free. Please do bookmark the page and come back to it as you work on your pattern though, rather than trying to print it out. Spending time on this page is how I get paid.
Alternatively you can purchase a premium pdf version of the pattern, which includes schematic, stitch tutorials, links to lots of video tutorials and full explanations. The premium pattern comes in US and UK terms. And of course, if you purchase the pattern, it is yours to keep, print and make notes on too.
PLEASE NOTE: The premium pattern is a pdf crochet pattern, written in English. It is not a finished project. You will receive a digital download upon completion of purchase.
Tension:
Work the first 9 rounds of any square to measure 4 x 4 inches (10 x 10cm) using 4mm hook, or hook required to meet gauge.
Stitch Abbreviations
- blo – back loop only (back loop only crochet tutorial)
- CC – contrasting colours (for making the squares)
- ch(s) – chain(s)
- ch-sp(s) – chain space(s)
- dc – double crochet
- MC – main colour (for borders)
- Mdc – mosaic double crochet
- rep – repeat
- RS – right side
- sc – single crochet (how to do a single crochet stitch)
- slst – slip stitch
- st(s) – stitch(es)
- WS – wrong side
- […] – stitch count
- * – repeat the instructions from * around
- ** – used if a repeat ends partway through on the last repeat.
If you love this stitch pattern, you might also like this mosaic crochet blanket pattern.
What Special Crochet Stitches are Used to Make the Mosaic Crochet Blanket Pattern?
Magic Ring (MR)
The magic ring is a fantastic way to start crocheting in amigurumi, and any crochet in the round. It can be a bit complicated though, so do check out my magic ring YouTube tutorial for a visual guide.
- Lay the tail end of the yarn over your palm and wrap the ball end around your first 2 fingers. Cross the yarn over and hold that point with your thumb and forefinger.
- Pull the loop off your fingers, insert your hook into the hole and grab the ball end of the yarn with your hook.
- Pull the yarn back through the loop. At this point, readjust your hand so you are holding the yarn as you normally would.
- Put your middle finger and ring finger into the loop to hold it. Then yarn over and pull through to secure your ring.
You can then start crocheting into the ring in the normal way.
Overlay Mosaic Crochet
Overlay mosaic crochet uses the front loops and back loops to create a beautiful textured colourwork project. You work each alternate round in a different colour using a combination of two stitches: the single crochet in the back loops only; and the mosaic double crochet in the front loops only of the stitch two rounds below the current round. The single crochet will always be worked into a stitch of the other colour, whilst the mosaic double crochet stitches are worked into a stitch of the same colour.
Click here to watch a tutorial on overlay mosaic crochet.
When you work mosaic crochet in rows, you need to cut your yarn after each row. However this pattern is worked in the round, so you can just leave the yarn hanging behind your work, ready to be picked up again for the next round. This means less ends to sew in!!
Mosaic double crochet (Mdc)
- Yarn over and insert your hook into the unworked front loop of the stitch from the row below the one you would normally work into (it will be the same colour as the yarn you are using).
- Yarn over and pull through.
- Yarn over and pull through two loops.
- Yarn over and pull through the remaining two loops to complete the stitch.
Mosaic Crochet in the Round
Working mosaic crochet in the round is similar to mosaic crochet in rows with a few differences.
When working Mdc in the corner stitches, the first and last 2 Mdc on each side will be worked into the same corner stitch. This is because we are working 2 rounds down and there is only 1 unworked front loop available to work into. If you have Mdc in the first and second stitch of the side, you will end up with 4 stitches worked in the corner loop 2 rounds down.
At the end of each round, you will slip stitch into the first st to join. You will then slip stitch with the new colour into the corner chain space to start the next round.
Working the Corners in Overlay Mosaic Crochet
The corners are definitely the trickiest part of this pattern, so I’ve included a guide on how to work the different types of corners.
sc, ch1, sc
In the back loop of the corner ch-sp, work a single crochet, chain 1, and then work another single crochet.
Mdc, ch1, Mdc
In the front loop of the corner ch-sp 2 rounds below, work a Mosaic double crochet, chain 1, and then another Mosaic double crochet.
2Mdc, ch1, 2Mdc
As Mosaic double crochet stitches are worked into the stitch 2 rounds below, you will find that there are not enough front loops to work the corner stitch and the one next to it into. Therefore they both need to go into the front loop of the corner ch-sp on each side. So you will end up with 4 Mdc in the same stitch. You will then need to skip a stitch before and after the corner on the current round.
The first corner: Mdc, ch1, 2Mdc
At the start of any round with 2Mdc in the corners, we begin with 1Mdc, chain 1, 2Mdc in the front loop of the ch-sp 2 rounds below. This is because the round starts in the stitch directly before the corner. We then add the other Mdc as the last stitch of the round in the same front loop of the corner ch-sp as the other 3 Mdc are.
Looking for more mosaic crochet patterns? Have a look through this mosaic crochet collection and see if you find your next project.
Slip stitch seam
The flat slip stitch seam is a lovely decorative way to join your squares together.
Lay 2 squares next to each other with RS facing up and put a slipknot on your hook:
- Insert your hook into the back loop of the st on the panel nearest you, then insert your hook into the back loop of the corresponding st on the panel furthest from you. These are the 2 loops nearest the table or the inside loops.
- With the yarn held between the 2 squares and to the underneath, yarn over.
- Pull through both loops and the loop on your hook, keeping your tension fairly loose.
- Continue across your seam, keeping the yarn underneath throughout.
Watch a video of the flat slip stitch seam being made.
Making your Mosaic Tile Crochet Blanket Perfect For You
You can make your blanket however big you like by making more or less of the squares. There are 4 different squares which can be made in any combination of colours, so the possibilities are endless.
You can make your blanket as a square or rectangle.
If you want a small lovey size blanket, try making just 4 squares and joining them in a 2 by 2 formation.
Or go larger make a rectangular blanket for a bed by making 120 squares and joining them in a 10 by 12 formation – this would make a blanket 85 x 102 inches (216 x 260cm).
If you don’t fancy making a blanket, make some of the squares using cotton yarn to use as washcloths, potholders, or how about making them into a bag or purse!
Colour Combinations
There are so many options for colours for this blanket and I do think this is a great opportunity to use a whole array of colours from your stash!
When considering your colour choices, bear in mind that there are 4 different square designs which can be arranged in many different ways as well. See page 10 for arrangement options.
Here are some other colour ideas:
Two-tone – Use just two colours across all squares for a bold, graphic look.
Tone-on-Tone – Choose colours within the same shade family (e.g. all pinks or all greens) for a gentle, blended effect.
Rainbow Tiles – Assign each square a different colour pairing from across the rainbow.
Neutrals with a Pop – Use mostly neutral tones (cream, beige, grey) and add one or two brighter colours
Scrappy Stash Blanket – Use leftover yarns for a completely unique look. Keep one consistent colour (like the background or border) to tie everything together.
Pattern Notes
Be sure to read through these notes before you start your mosaic crochet square pattern – they will make it so much easier to understand the pattern!
- Read through the pattern completely before starting and refer to the stitch tutorials as needed.
- The pattern squares use either single crochet in the back loop only or Mosaic double crochet stitches.
- Only 1 colour is used per round.
- Change yarn with a slip stitch to start each new round, leaving the unworked yarn behind to be picked up again when needed.
- St counts are given in [ ] at the end of a round.
- On each corner, you will find a ch1 corner space, which you will work into in the next round. Use a stitch marker to mark these corner chain-spaces. Don’t be afraid to push the stitches out of the way to see where you need to work either.
- ch1 spaces are not included in the stitch count.
- All squares reference yarn A and yarn B for the 2 alternating CC yarns, but you can use any two colours (out of the 6 I used or whichever colours you choose).
Prefer a Video Tutorial?
If you prefer crocheting from a video tutorial, watch as I show you how to crochet the blooming tiles mosaic crochet blanket:
Join the Concrete Gems Crochet Community for pattern support!
Arranging your Squares
There are numerous ways to arrange your 4 squares in your blanket, and sometimes a random arrangement can look the best.
Before you begin making your squares, you might want to consider your arrangement as some of them require different numbers of each square.
I used my 6 square colours randomly across my 20 squares and then arranged them so that the colours were fairly evenly distributed. You may want to plan this more carefully though, if you don’t want certain colours close to each other.
Mosaic Crochet Blanket Free Pattern
US Terminology.
Make your required number of mosaic crochet square 1.
Make your required number of mosaic crochet potholder – blanket square 2.
Make your required number of mosaic crochet flower pattern 3.
Make your required number of mosaic crochet square pattern 4.
To unlock the free, exclusive content from Concrete Gems Crochet, all you have to do is enter your email address and create a password in the box below.
Every time you see Grow Exclusive Content from then on, you will be able to log in with your username and password and view the content. This also applies on other blogs, who use Grow.
Thank you for subscribing! I hope you enjoy the free patterns on this site. I can’t wait to see what you create! Please do share your crochet makes tagging @concretegemscrochet
Blanket Border
If you are doing a different number of squares or layout, your st counts will differ to those stated below. Join yarn MC in any corner ch-sp with a ch1.
Round 1: *(sc, ch1, sc) in blo of corner ch-sp, sc in blo of each st across to corner, rep from * around, sl st in first st to join, slst in ch-sp. [666 sts]
Rounds 2-4: rep Round 1. [690 sts]
Work further rounds of the border as desired.
Fasten off, weave in ends and enjoy your blanket!
How about trying another mosaic pattern? This snowdrops crochet strip is also perfect for turning into a blanket.
Check out my other crochet patterns too for more crochet inspiration.
Pattern help
There is a lot more detail in the premium pdf pattern of the mosaic crochet blanket, including photos, stitch tutorials and a schematic. Plus it’s your to print out and keep!
Also please do check out the stitch tutorials on my YouTube channel for extra guidance.
Get the ad-free PDF here!
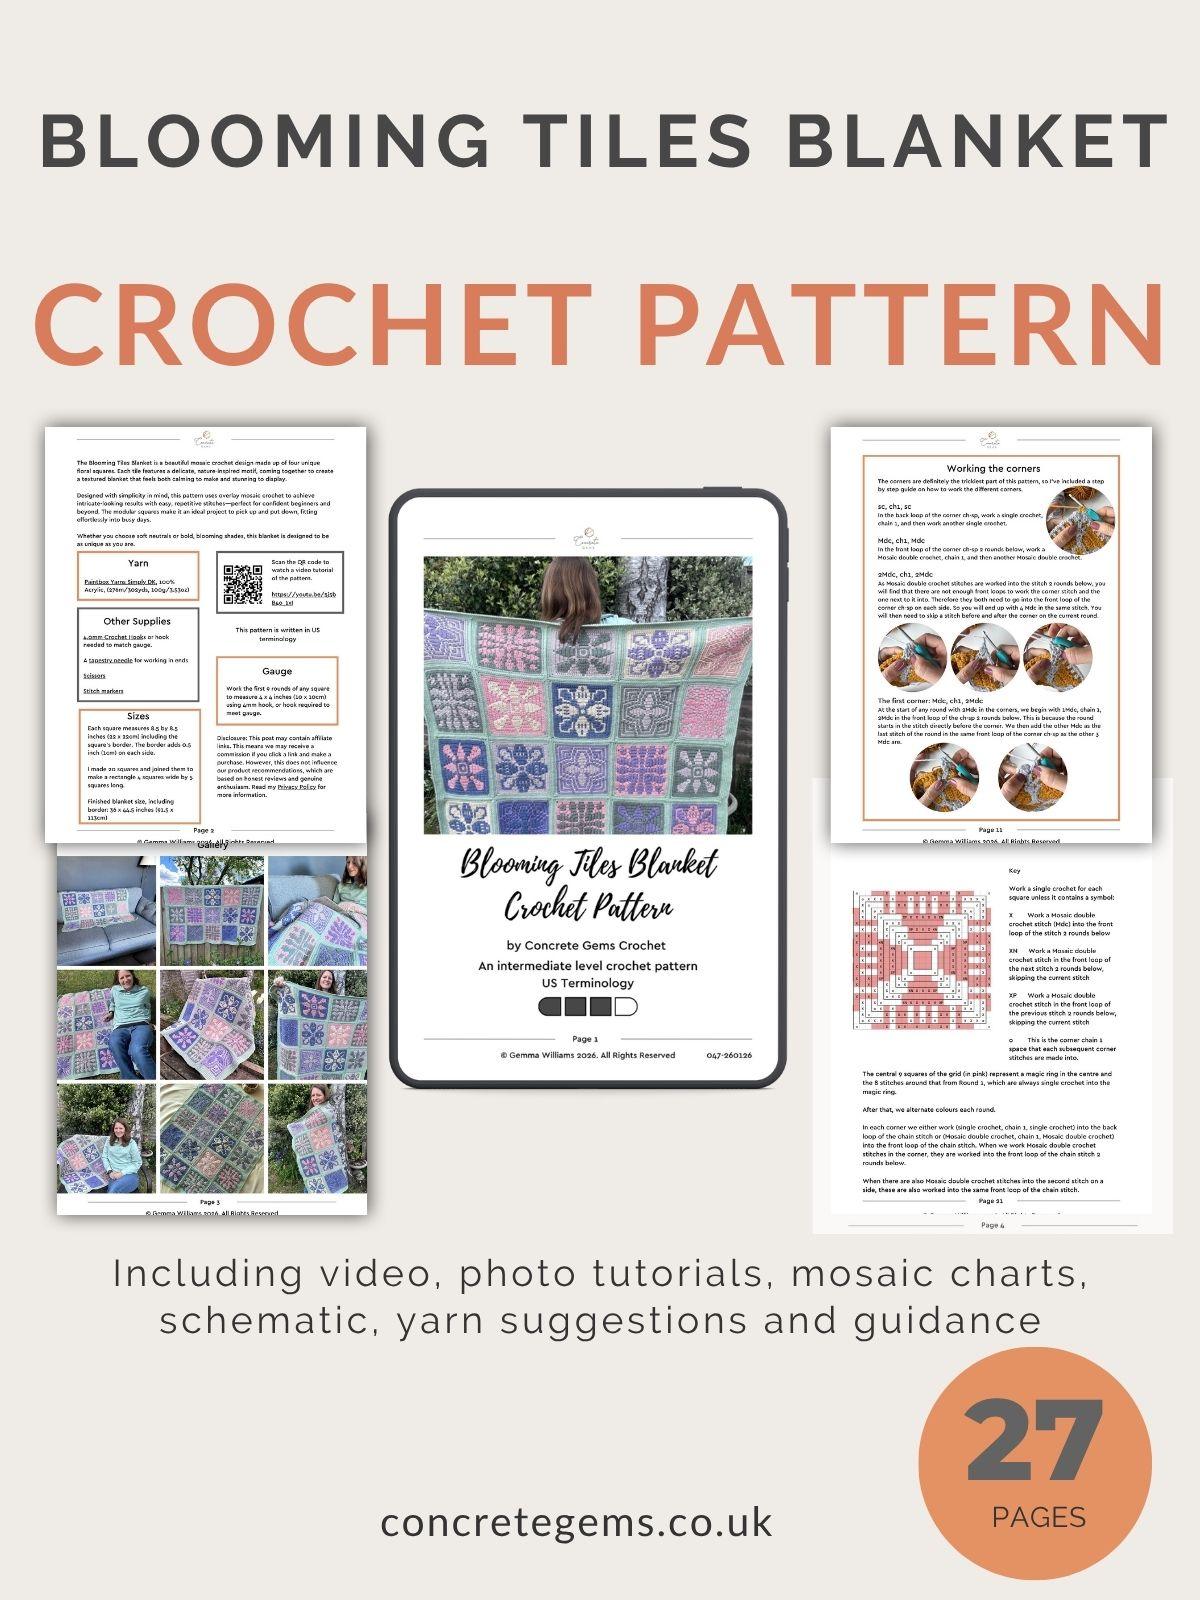
Upgrade to the premium PDF and create the Blooming Tiles Blanket — a beautifully textured, floral mosaic crochet design that’s calm, creative, and a joy to make.
What You Get
✨ Ad-free, printable PDF in UK and US terms — instant download
🌸 Four unique floral square designs, worked in the round
🧶 Mosaic crochet technique with no sewing in ends
📊 Mosaic charts for each square for visual learners
🎥 Supporting video tutorials to guide you along the way
📐 Blanket schematic, colour placement ideas, and layout options
💛 A relaxing, modular project you can pick up and enjoy anytime
If you are struggling with the pattern, please don’t hesitate to reach out.
Find me on Facebook or Instagram @concretegemscrochet or drop me a message.
FAQs
A: A mosaic crochet blanket is made using a colourwork technique that creates intricate patterns with simple stitches. This mosaic crochet blanket pattern uses squares worked in the round to form a textured floral design without complex colour changes.
A: This pattern is suitable for confident beginners and beyond. If you’re comfortable with basic stitches and following a pattern, you’ll be able to learn mosaic crochet in the round with the help of the written instructions, charts, and video tutorials included.
A: This blanket is made from individual mosaic crochet squares, each worked in the round. Once complete, the squares are joined together and finished with a border to create the final blanket.
A: No—one of the benefits of this mosaic crochet blanket is that you don’t need to sew in lots of ends. The yarn is carried up the inside of each square as you work, keeping finishing simple and tidy.
A: Yes, the size of your mosaic crochet blanket can be easily adjusted by making more or fewer squares. This makes it a flexible pattern that can be adapted to suit your needs.
You’ll need 2 colours for each square and one main colour for the border and joining. This pattern is ideal for experimenting with colour combinations or using yarn from your stash.
If you enjoyed making your flower crochet blanket pattern please consider sharing it to social media tagging @concretegemscrochet or come and join the Concrete Gems Crochet Community to share in the joy of crochet with me.
Other Crochet Patterns you Might Enjoy
If you enjoyed making this crochet mosaic blanket, then you might also like these mosaic crochet patterns:
- Reversible crochet headband – using overlay mosaic crochet
- Mosaic crochet wedding blanket – create a stunning silhouette of a wedding couple.
- Easy mosaic book sleeve – with mosaic crochet snowflakes for Christmas gifting.
Thanks for reading and happy crocheting! 🧶