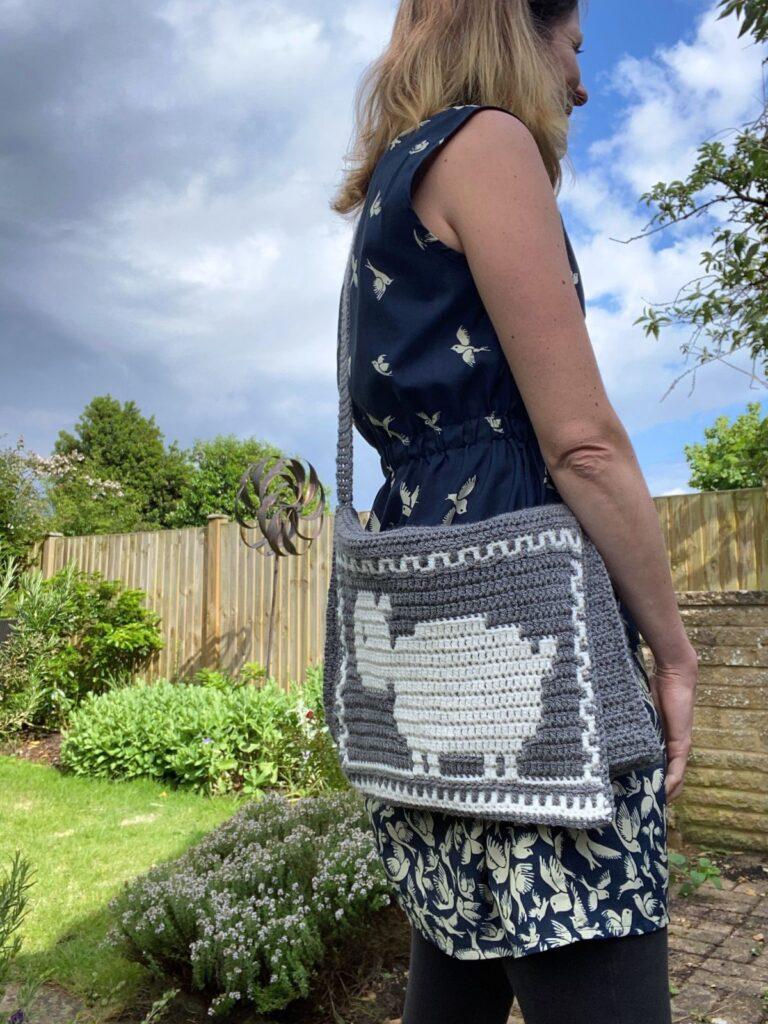
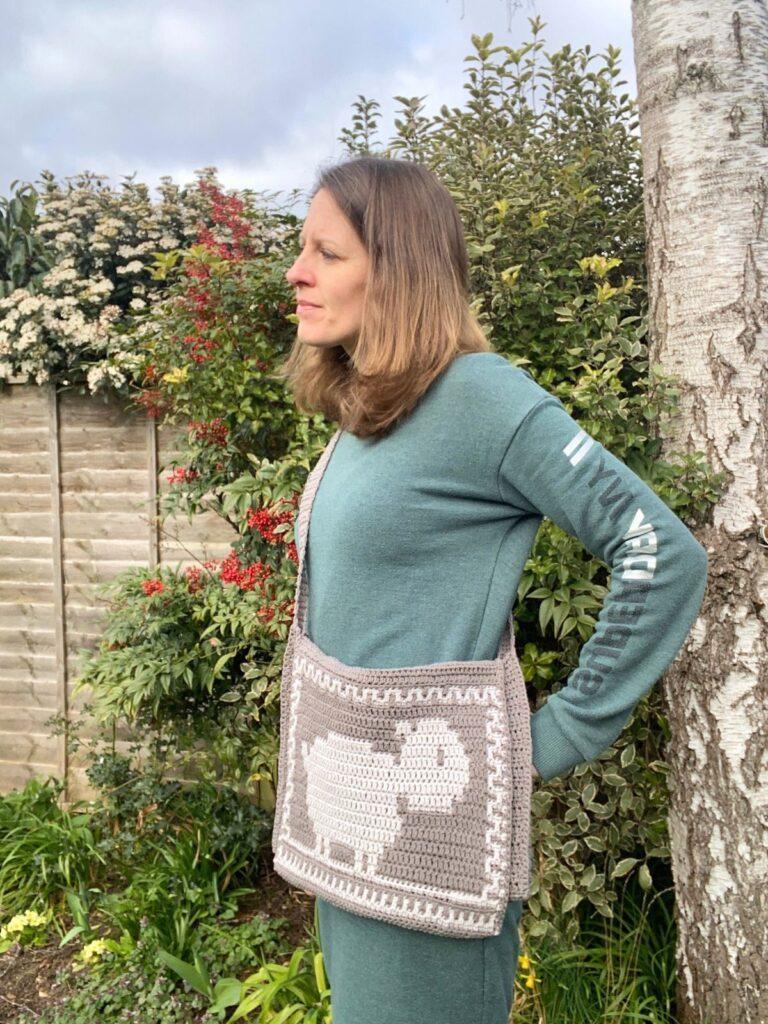
As a crocheter, I know that you like yarn! I mean, it is literally the lifeblood of a crocheter. And whilst not all yarn is wool anymore, the sheep can be seen to represent yarn as a whole quite often! In celebration of the animal that gave life to all yarn crafts, I’m excited to introduce this crochet shoulder bag pattern with cute sheep motif!
Made using overlay mosaic crochet for the bag flap and simple stitches for the main body of the bag, this design is fun to make and a delight to use! Make it for yourself to carry your latest project in, or as a gift for a friend or child. It is just the perfect size for my laptop too!
Made with DK weight yarn, it works up fairly quickly and looks amazing in any combination of two colours. Plus it can be a great stash buster project too!
This pattern includes clear, step-by-step instructions to help you create a stunning mosaic crochet bag with ease. There’s also a video tutorial to help you on your way!
Disclosure: This post may contain affiliate links. This means we may receive a commission if you click a link and make a purchase. However, this does not influence our product recommendations, which are based on honest reviews and genuine enthusiasm. Read my Privacy Policy for more information.
Perfect for confident beginners and intermediate crocheters, this crochet sheep bag is made using the overlay mosaic crochet technique, creating a striking, textured design without the need for color changes mid-row. Whether you’re heading to the farmers’ market, a craft fair, or just out and about, this bag is sure to turn heads!
How is the Crochet Sheep Bag Made?
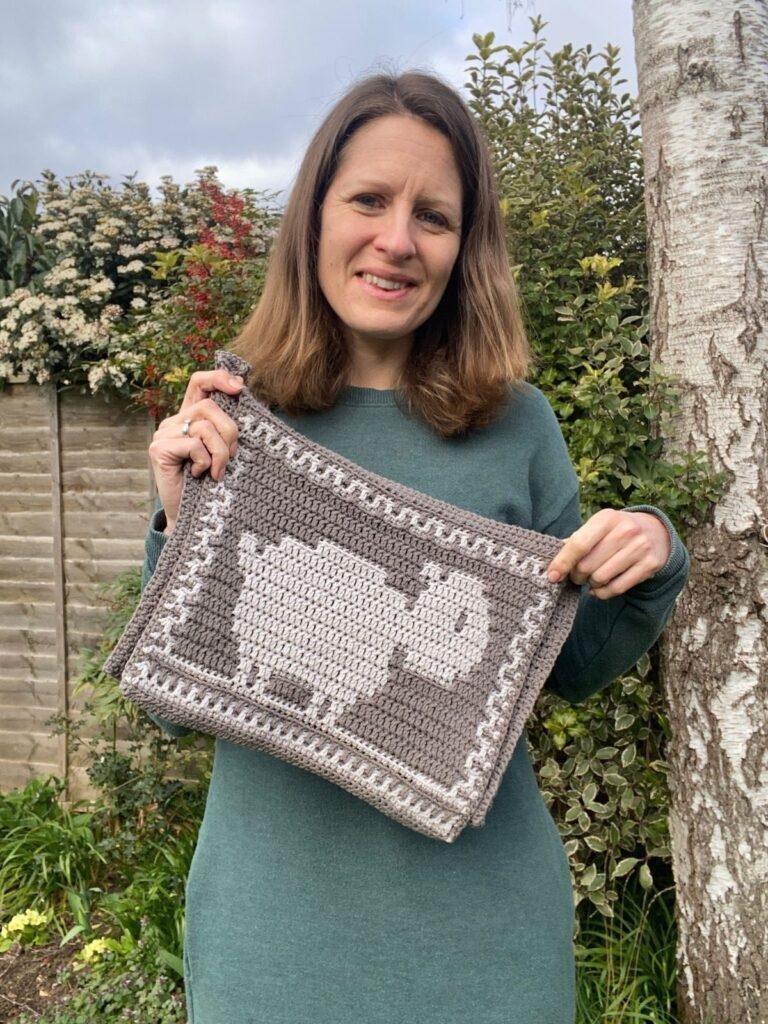
The bag is made out of a simple rectangle with the first third of it being made in overlay mosaic crochet.
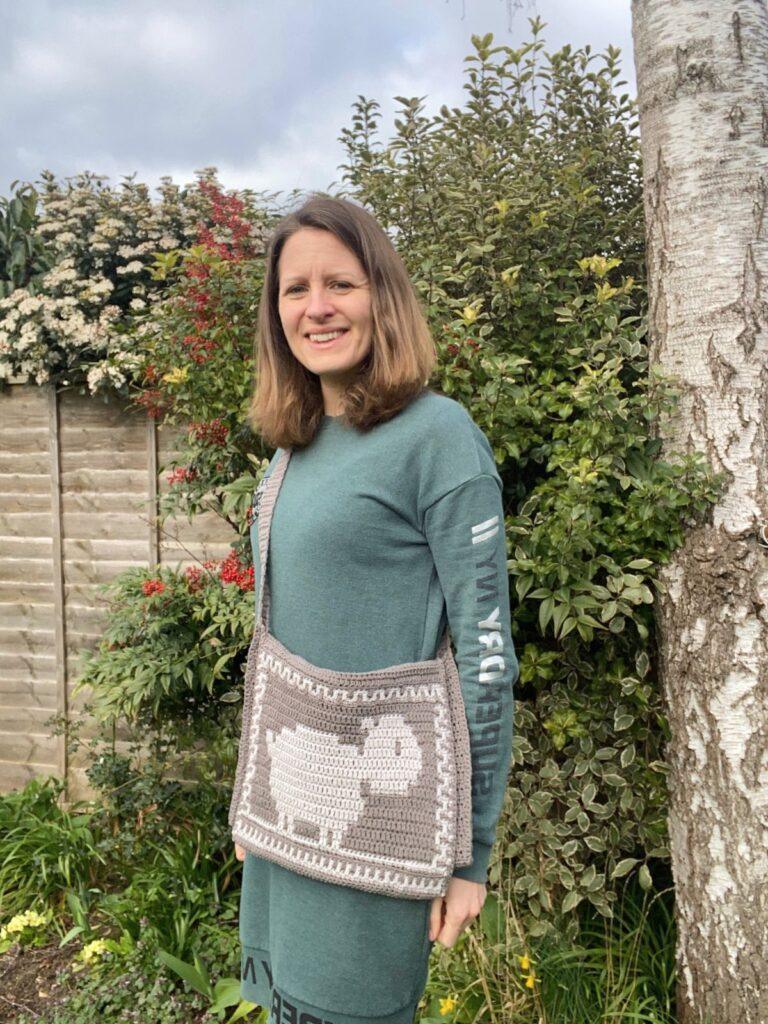
The handle is then made separately as a long rectangle, before the handle is attached to create the shape of the bag.
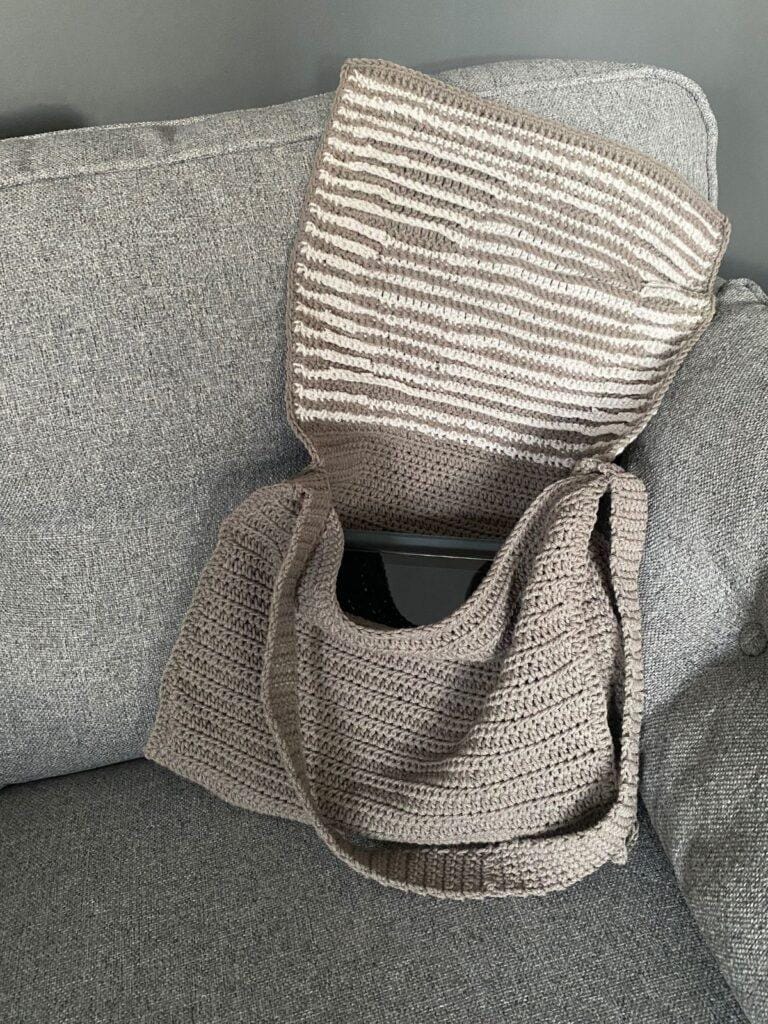
And that is your bag completed! You can also add a fabric lining if you prefer.
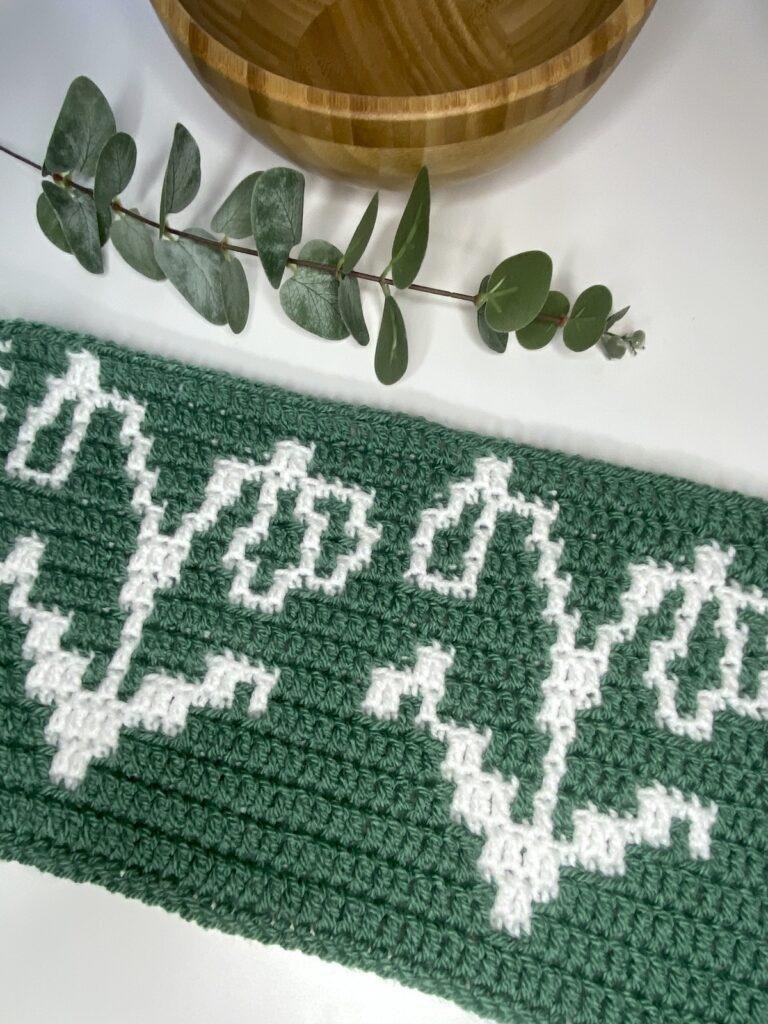
What is Overlay Mosaic Crochet?
As I mentioned, the bag flap with the sheep on is created using overlay mosaic crochet.
Overlay mosaic crochet is a beautiful crochet technique, which uses only single and double crochet stitches to create amazing designs.
This is achieved by working into the back loops and front loops of different stitches. You work each alternate round or row in a different colour using a combination of two stitches: the US single crochet in the back loops only; and the US double crochet in the front loops only of the stitch two rows/rounds below the current round or row.
The single crochet will always be worked into a stitch of the other colour, whilst the mosaic double crochet stitches are worked into a stitch of the same colour as the one you are using. Amazingly though, we will only use one colour per round or row.
Click here to watch a tutorial on overlay mosaic crochet.
Overlay mosaic crochet is worked from right to left (for a right-handed crocheter) on the front of the work only. This means you need to cut your yarn at the end of each row and restart at the beginning again with your new yarn, always working on the right side.
You will need:
Sirdar Stories DK, 60% Cotton, 40% Acrylic (50g/1.76oz, 140m/153yds) in City Break x 4 balls (Yarn A) and Sky Bar x 1 ball (Yarn B)
4.0mm Crochet Hook or hook needed for your yarn
A tapestry needle for working in ends
Fabric to line the bag (optional)
Yarn Alternatives
There are so many options for yarn for your Sheep Bag. Feel free to use another DK yarn for this project. A cotton would stretch less than the acrylic does, so consider this when choosing. Make sure to match the gauge if you are using an alternative, otherwise your bag will turn out a different size.
You will need 2 contrasting colours.
Here are a few alternative options:
Stylecraft Special DK, 100% Acrylic (100g/3.5oz, 295m/323yds)
Hayfield Bonus DK, 100% Acrylic, (100g/3.53oz, 280m/306yds)
Brava Recycle, 100% Recycled Acrylic, (100g.3.53oz, 289m/306yds)
Sizing
The sheep bag is 14in x 10in (36cm x 25cm) once assembled.
How to get the pattern
There are a few different ways that you can get your crochet shoulder bag pattern.
You can carry on scrolling down and read the pattern for free on the blog in US crochet terms. The blog has ads on it, which is how I am able to offer it for free. Please do bookmark the page and come back to it as you work on your pattern though, rather than trying to print it out. Spending time on this page is how I get paid.
Alternatively you can purchase a premium pdf version of the pattern, which includes stitch tutorials, links to lots of video tutorials and full explanations. The premium pattern comes in US and UK terms. And of course, if you purchase the pattern, it is yours to keep, print and make notes on too.
PLEASE NOTE: The premium pattern is a pdf crochet pattern, written in English. It is not a finished project. You will receive a digital download upon completion of purchase.
Included in the premium pattern:
- A 15 page downloadable PDF with easy-to-follow instructions in US and UK crochet terms
- Detailed stitch guides and tips for perfect results
- Yarn recommendations and size adjustments
- Stitch chart of the mosaic section
- Pattern support if needed
- An accompanying video tutorial
Difficulty level is Easy.
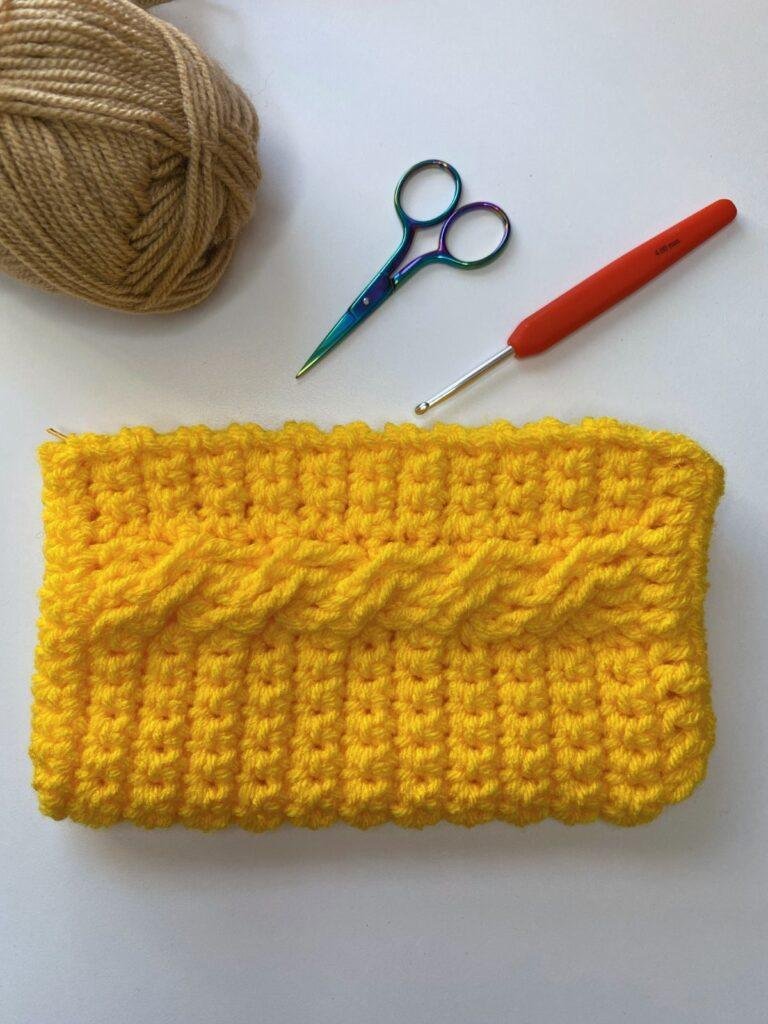
Tension:
16 sts and 12 rows = 4in x 4in (10cm x 10cm) over hdc.
Make a tension or gauge swatch in hdc that is bigger than 4in (10cm) square, so that when you measure it, you are not counting the edge stitches, as these are often not representative of a normal stitch.
If your sample swatch is bigger than the tension given, try with a smaller hook size. If your swatch is smaller than the tension given, try with a larger hook size.

Creating your Perfect Mosaic Crochet Bag
Because of the Mosaic Section on the front, it is quite difficult to change the size of your bag. You are welcome to use a different weight yarn with a corresponding hook, which will naturally change the finished size.
You can easily adjust the bag strap length by crocheting more or fewer rows of the strap.
Abbreviations
blo – back loop only
flo – front loops only
Fsc – foundation single crochet
hdc – half double crochet
mdc – mosaic double crochet
rep – repeat
RS – right side
ss – slip stitch
st(s) – stitch(es)
WS – wrong side
[…] – stitch count
* – repeat the instructions from * around
Pattern Notes
- Read through the pattern completely before starting and refer to the stitch tutorials as needed.
- Ch1 does not count as a stitch throughout. With hdc rows, ch2 does not count as a stitch throughout.
- Stitch counts are given in this pattern in [ ] at the end of each row. Where no stitch count is given, it is the same as the previous round.
- There is a stitch chart in the premium pdf, showing the Mosaic Section of the bag (rows 1-38) if you prefer to use a chart over written instructions for that section. Each row on the stitch chart should be read from right to left (for right-handed crocheters). Rows are read from bottom to top.
- This tutorial is written for right-handed crocheters. If you are left-handed, you will be working from left to right across the bag and your sheep will appear facing the other direction if you follow the written instructions. Alternatively you can follow the chart and work from left to right.
- The first and last st of each row of the Mosaic Section will be made with a sc through both loops.
- The Mosaic Section is worked on the front of your work, cutting your yarn and re-attaching to the start for the next row.
- Once you have finished the mosaic section, you will re-join your yarn A to the right side and then you will start working the hdc section in turned rows using yarn A throughout.
Special Stitches
Below are the instructions for all the special stitches you will need for your free crochet bag pattern.
Mosaic double crochet (mdc)
- Yarn over and insert your hook into the unworked front loop of the stitch from the row below the one you would normally work into (it will be the same colour as the yarn you are using).
- Yarn over and pull through.
- Yarn over and pull through two loops.
- Yarn over and pull through the remaining two loops to complete the stitch.
Foundation Single Crochet (Fsc)
A foundation sc allows you to create that first row of your project without using a chain.
- Start with a slipknot and ch2 (this does not count as a stitch).
- Insert hook in second ch from hook and pull through a loop.
- Yarn over and pull through one loop (this makes the chain part of your first Foundation sc).
- Yarn over and pull through both loops on your hook (this makes the sc part of your first Foundation sc).
- Insert your hook into the chain part of the previous stitch, going through the two top ‘v’ shape strands of the chain.
- Yarn over and pull through one loop (this makes the chain part of the Foundation sc).
- Yarn over and pull through both loops on your hook (this makes the sc part of the Foundation sc).
- Repeat steps 5 to 7.
This stitch is shown in full detail in this foundation single crochet video tutorial.
Pin this free Crochet Messenger Bag pattern for later

Full-length Video Tutorial
If you prefer crocheting from a video tutorial, hop on over to my YouTube channel and watch how I crochet this shoulder bag pattern.
The video will take you through all of the steps needed to make your crochet sheep bag, including: a step by step walk through of the overlay mosaic sectio;, how to make the handle; and a full tutorial on how to assemble your bag at the end.
Free Crochet Shoulder Bag Pattern
US Terminology.
To unlock the free, exclusive content from Concrete Gems Crochet, all you have to do is enter your email address and create a password in the box below.
Every time you see Grow Exclusive Content from then on, you will be able to log in with your username and password and view the content. This also applies on other blogs, who use Grow.
Thank you for subscribing! I hope you enjoy the free patterns on this site. I can’t wait to see what you create! Please do share your crochet makes tagging @concretegemscrochet
Rows 40-97: ch2, hdc across, turn.
Row 98: ch2, hdc across.
Fasten off. Weave in all mosaic ends and block. Don’t worry if the mosaic section is slightly smaller than the hdc section. After blocking and assembly, this will even out.
Handle
With Yarn A, ch7.
Row 1: sc in 2nd ch from hook and across, turn [6 sts].
Rows 2- 199: ch1 (does not count as a st here and throughout), sc across, turn.
Row 200: ch1, sc across.
Fasten off.
If you want your handle to be longer or shorter than this, adjust the number of rows accordingly, but remember that it will stretch when you put things in the bag.
Assembly
With the sheep at the top of the rectangle with WS facing, count 27 rows up from the bottom along one side. (See diagram on page 12). Join one corner of handle to this stitch with a stitch marker. Join the next corner of the handle 3 rows further up the bag rectangle with another stitch marker. Use more stitch markers to join the bag to both side of the handle, so that the handle is attached to 27 rows of the rectangle on each side.
Do the same with the other end of the handle and the other side of the bag.
You should now have a bag shape with the sheep part forming a flap to go over the top of the bag.
With the sheep flap open with the bag the right way round, join your yarn to the front top right edge. This was the bottom right corner of the rectangle when it was flat. We are now going to crochet the bag to the handle on the RS. Sc through both the rectangle and the handle evenly down the side to join. At the corner, make 2sc. Continue along the bottom of the handle and up the other side, placing sc evenly through both the rectangle and the handle, and 2sc in the corners.
When you reach the point that is level with the start of the join on the first side, stop crocheting through the handle. Continue to sc in each st around the sheep flap, placing 2sc in the corners.
When you reach the other side level with where the first handle starts, begin joining the handle and the rectangle together as you did for the first side. Remember to crochet 2sc in each corner. When you reach the end, fasten off and weave in all ends.
To stop your bag stretching too much, you might consider lining it.
Check out my other crochet patterns for more crochet inspiration.
Pattern help
There is a lot more detail regarding the special stitches in the crochet shoulder bag premium pdf pattern, including images and a chart. Also please do check out the stitch tutorials on my YouTube channel for extra guidance.
If you are struggling with the pattern, please don’t hesitate to reach out.
Find me on Facebook or Instagram @concretegemscrochet or drop me a message.
Copyright Notice
The Sheep Bag crochet pattern is the intellectual property of Concrete Gems. It is strictly prohibited to share, copy, alter, or distribute this pattern in any form.
You are welcome to sell finished items made using this pattern on a small scale, provided you give design credit to @concretegemscrochet. Thank you for respecting the effort and creativity that went into creating this design.
What next?
I’ve really loved designing this easy mosaic crochet bag pattern for you and hope you have had fun making it. I’m Gemma, a crochet tech editor, designer and overall crochet enthusiast. I’m also a mum of 3 kids, and enjoy running, reading, walking and crafting, but mostly crochet!
Sign up to my mailing list for the latest news, pattern releases and special offers here
If you enjoyed making your crochet shoulder bag, please consider sharing it to social media tagging @concretegemscrochet
Other overlay mosaic crochet patterns you might enjoy
If you enjoyed making this bag pattern, then you might also like these free mosaic crochet patterns:
- Free Crochet Placemats pattern – reversible for twice as much use
- Easy Crochet Cushion Cover Free Pattern – a geometric mosaic crochet design
- Small Crochet Handbag Pattern – with a vintage style mosaic front
Check out all of my other patterns here.

Thanks for reading and happy crocheting! 🧶

2 Comments